|
Previous Builder
Next Builder
Date: 10-18-2024
|
Number of Hours: 1.00
|
Short Description: Sample Weight and Balance Calculations
|
I created an EXCEL spreadsheet that calculates weight and balance; then created numerous sample weight and balance calculations. For these samples, I am using 1900 pounds as the "builder designated gross weight'; CG is still stays well-within specified limits.
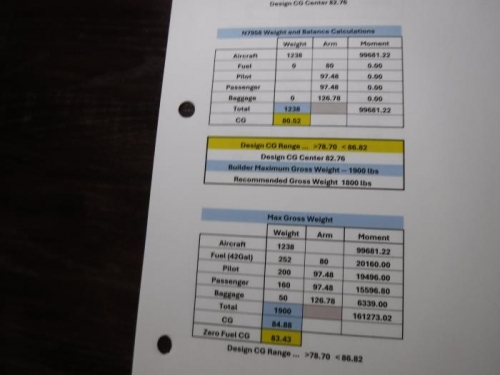
Max gross Weight
|
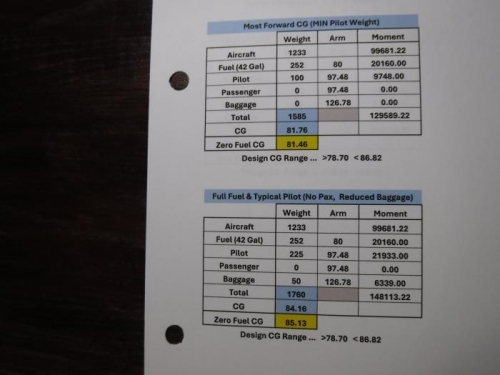
Most Aft; Most Forward; Typical
|
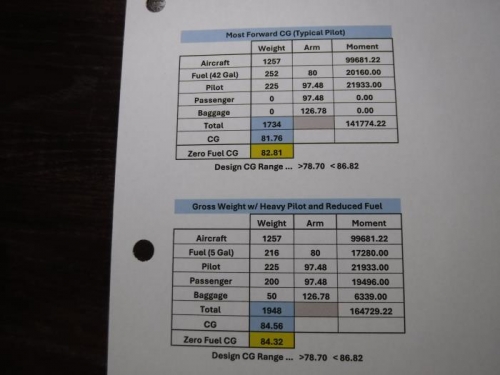
Typical & horizontally challenged
|
Previous Builder
Next Builder
|