|
Previous Builder
Next Builder
Date: 01-21-2023
|
Number of Hours: 3.00
|
Short Description: Inboard Rib Sub-Assembly
|

|
All of the mating surfaces for the inboard rib parts were cleaned, scuffed and cleaned again. I mixed up 22 grams of sealant (20 grams of the white stuff and 2 grams of hardener) and it turned out to be just enough to complete the job.
I had been eager to start using the sealant, but right away I saw how much of a pain it is to use. I changed gloves frequently to try and keep the parts as mess free as possible. I think I went through about 10 pairs in this session. I did manage to keep the stuff off my face and clothes fortunately.
First the 3/16 in. tooling holes need to be sealed with a rivet and encapsulated. There were a lot of tips how to drive such a big rivet and I was worried that my 3X gun wasn't big enough to drive it properly. Turns out it was no big deal. I turned up the pressure to 90 psi and opened the flow restrictor to max and had no trouble with the gun and bucking bar. I did have to purchase a 3/16 rivet set though.
Next up were the VA-141 fuel flanges. I had a hard time getting good sets as the tails would tend to clench to varying degrees. I think the AD4-5 rivets called out in the plans are a bit too long, so when I do the RH rib I'll use something shorter. I wasn't worried about the clenching because these rivets aren't loaded much and are fully encapsulated.
The rivet heads and tails were encapsulated using a scrap piece of flaired tubing. The flare was perfect to make a good dome around both the shop and manufactured head.
|
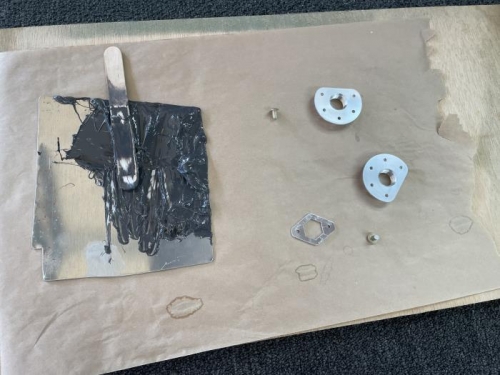
22 grams of sealant was enough to do these parts
|
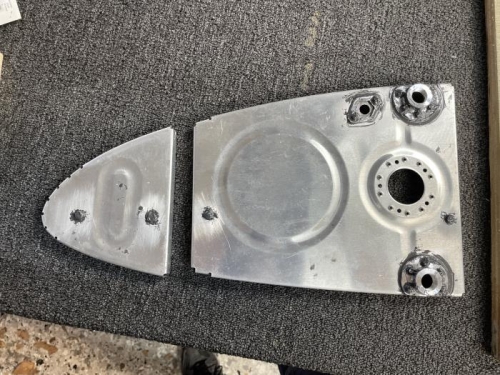
Inboard rib sub-assembly completed and fully sealed
|
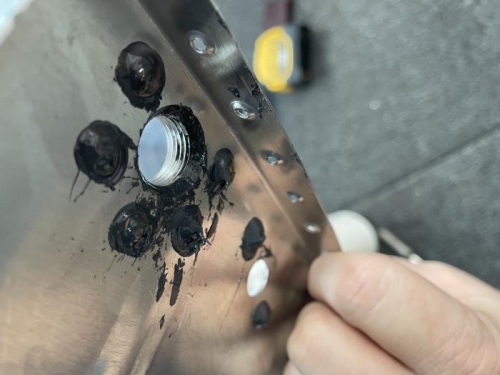
I used a bit of scrap flared tubing to encapsulate the rivet heads
|
Previous Builder
Next Builder
|