
|

|
|
|
Bob Leffler's RV-10
|
Date: 1-8-2011
|
Number of Hours: 2.00
|
Manual Reference: 46-06
|
Brief Description: Nose Wheel
|
|
46-06, Steps 1, 2, 3, 4, & 5
Slide the WD·l 031 Axle Flange onto the WD-l017 Nose Gear Leg spindleand secure it to the spindle. Next, slide on the Nose Fork Assembly, the two K2750-0-219 Belleville Washers, and the 5710-243-060 Washer. (The belleville washers are "cupped", and to function properly, the outside perimeter of both washers must be in contact with each other when installed.) Finally, thread on the MS21025-24 Nut.
Thread safety wire through the holes used to secure the Nose Wheel and Tire Assembly to the Nose Fork Assembly, then attach a spring scale to the end of the safety wire. Tighten the MS21025-24 Nut until a force of 26 Ibs begins to rotate the Nose Fork Assembly around the spindle. Secure the nut with the cotter pin.
Slide the U-l009 Axle through the bearings, then slide the two U-l023 Spacers over
the ends of the axle. I didn't use this axle, I used a new styple of axel from Matco. Bolt the Nose Wheel andTire Assembly, the axle, and the spacers to the Nose Fork Assembly.
Slide the four J-11968-14 Nose Gear Elastomers onto the shaft of the WD-l016 Nose Gear Link Assembly, then slide the shaft into the WD-l001-Dl Engine Mount. Slide the VA-143 Bushing into the nose gear link assembly, then bolt the nose gear link assembly to the WD-l017 Nose Gear Leg. Secure the nut with the cotter pin called-out.
Janice, Renee, and I couldn't compress the elastomers. I'll need to get some more muscle next time.
|
|
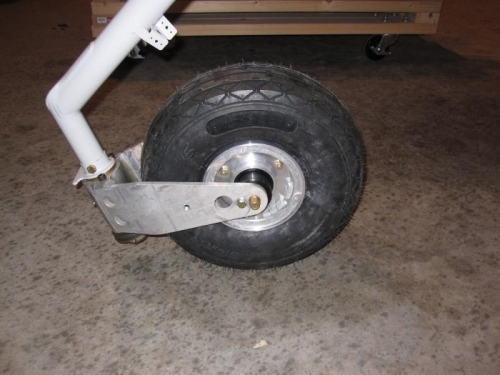
Nose Wheel
|
|

Nose Gear Link Assembly
|
|
|
|
|
|
|
|
|
Copyright © 2001-2024 Matronics. All Rights Reserved.
|