
|

|
|
|
Bob Leffler's RV-10
|
Date: 4-7-2010
|
Number of Hours: 1.00
|
Manual Reference: 23-6
|
Brief Description: Torque Tube Assembly #3
|
|
23-6, Steps 1, 2, 3, 4, & 5
Create the left side torque tube assembly by inserting the aft end of one of the WD-1014C Torque Tube Collars into the open end of one of the WD-1014 AFT Aft Torque Tube Subassemblies. Adjust the engagement of the torque tube collar and the aft torque tube subassembly such that the overall length is 17 ¾ inches. Adjust the clocking of the torque tube collar and the aft torque tube subassembly such that when a 5/16 inch thick spacer block is placed under the arm of the aft torque tube subassembly, the arm of the forward torque tube subassembly is flat on the table.
When assured that both the engagement and clocking of the torque tube assembly is correct, use a #30 bit to match-drill the torque tube collar using the holes in the aft torque tube subassembly as drill guides. Install a cleco in match-drilled. After the first hole is match-drilled and clecoed, the torque tube assembly can be moved off of the flat surface for drilling the remaining holes. Using a #12 bit, final-drill through both sides of the torque tube collar. Install a bolt, washer, and nut to hold alignment while the other bolt hole is final drilled #12.
Create the right side torque tube assembly by inserting the aft end of the remaining WD-1014C Torque Tube Collar into the open end of the remaining WD-1014 AFT Aft Torque Tube Subassembly. Adjust the engagement of the torque tube collar and the aft torque tube subassembly such that the overall length is 17 ¾ inches. Adjust the clocking of the torque tube collar and the aft torque tube subassembly such that when a 5/16 inch thick spacer block is placed under the arm of the aft torque tube sub-assembly, the arm of the forward torque tube subassembly is flat on the table.
Remove the nuts, washers, and bolts that were installed during final-drilling. Remove the WD-1014 AFT Aft Torque Tube Subassemblies from the WD-1014C Torque Tube Collars and deburr the holes. I also primed the torque tube before re-assembly.
|
|
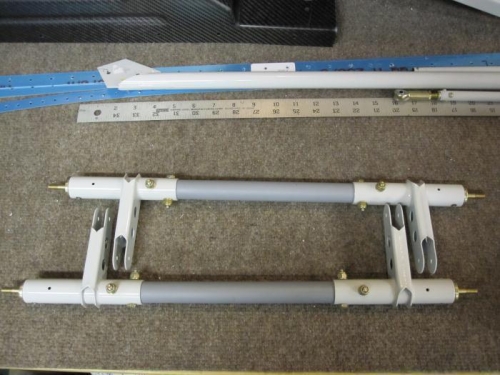
Torque Tubes assembled
|
|
|
|
|
|
|
|
|
Copyright © 2001-2024 Matronics. All Rights Reserved.
|