
|

|
|
|
Zenith CruZer & Sonex Logs
|
Date: 5-15-2011
|
Number of Hours: 3.10
|
Manual Reference: SNX-P13
|
Brief Description: Final Cowl Fitting
|
|
A great day.
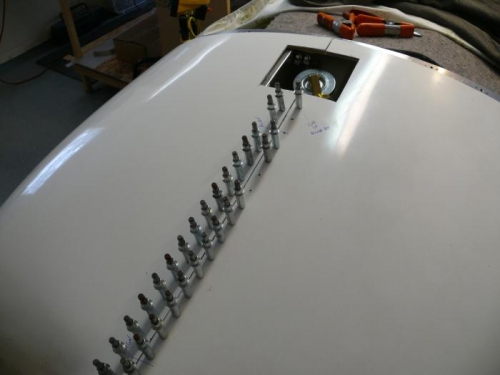
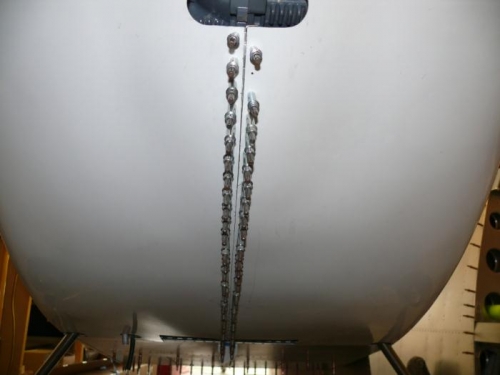
Did the work in two shifts. First, the centerline hinges were drilled in place on Friday, and the cowl unit was still on the workbench.
I made up the fiberglass "tab" that is 'glassed to the rear of the right cowl half. I used 4 layers of glass cloth that came in a kit I found at AutoZone. The plans say to use 10oz cloth; the kit didn't specify a weight; I'm assuming 10oz is close to the general-purpose stuff available. Made up the resin, coated on a thick coat, and layer by layer built-up the tab. This is placed between the prop and the oil cooler opening, since it's too short a distance to use piano hinge. It will have a hole drilled in it and a Southco fastener installed.
Spent quite a bit of time cleaning-off the clear packing tape I had used to hold everything together. Had to sequentially remove a cleco, remove the tape, then reinstall.
Finally time for the test install. I was concerned because the best fit on the bench resulted in the alignment marks I made being offset a bit. Fit like a champ. Lower centerline hinge was a bear to install; I later figured out it was because the aft lower firewall hinges were not installed, which help pull everything together, making for easier pin installation.
#2 son came over and helped me drill the lower firewall hinge holes. I then installed the prop (just slid into place) just for grins. Wanted to see it with the cowl installed.
Removed the cowl and made some final filings to improve the fit; it was a bit tight around the prop hub, plus one lower firewall edge was a bit tight.
Lastly, I measured and marked the cut lines for the cylinder cooling openings. Did not cut yet.
|
|
|
|
|
|
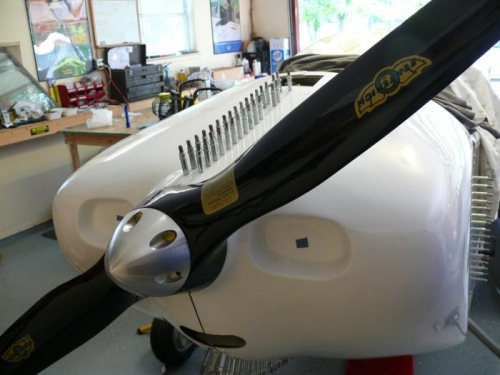
Couldn't Resist
|
|
|
|
|
|
|
|
|
Copyright © 2001-2024 Matronics. All Rights Reserved.
|