
|

|
|
|
Zenith CruZer & Sonex Logs
|
Date: 6-22-2010
|
Number of Hours: 1.30
|
Manual Reference: SNX-L01
|
Brief Description: Wheel Work
|
|
I had previously written to Sonex about the installed depth of the bearing cones for my wheels. Another builder had noted that it appeared the bearings were not fully seated into the wheels. Sonex said that he was the only builder affected. Well, I was #2. I thought I was going to have to use a HD press to get them fully in place, but was able to use a large socket and tap them all the way in with just a hammer. Sonex said that there should be <1/32" space between the dust shield and the wheel; all 4 wheel surfaces were anywhere from 3/32" to 1/8" - far too much. Once adjusted, I'd say the space is about 1/64".
Next, I filed each of the wheel half mating surfaces to ensure that there was no gap present due to excess flashing.
I then positioned the brake drums onto the wheels and filed one hole in each drum that would not accept the bolt holding the wheel together. Minor.
Talc'd up the tires and tubes, added enough air to round-out the tubes in the tires, then assembled the wheel halves into the tire. Added the hardware, torqued, then inflated both tires to 50 lbs as specified by Sonex, even though the wheels say not greater than 30 lbs. It seems the Sonex has a propensity to spin the tires on the rims at lower pressures.
Still need to bend the brake cable guides which wrap around the axle housing, drill the axle-to-backing plate hole, fasten them, then install the bearings and axle nut, and I can wheel it out of the garage for the first time!
|
|
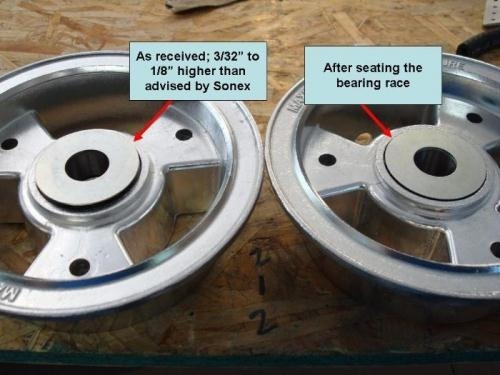
Bearing Depth Adjustment (all 4)
|
|
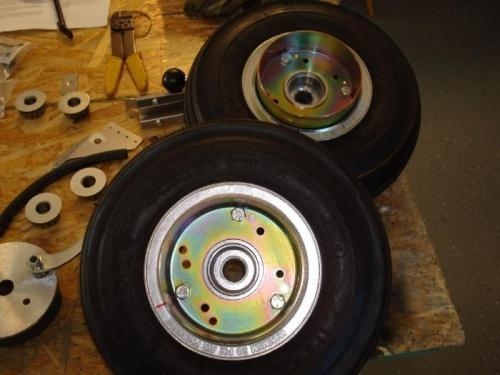
Assembled Wheels / Inflated to 50 PSI
|
|
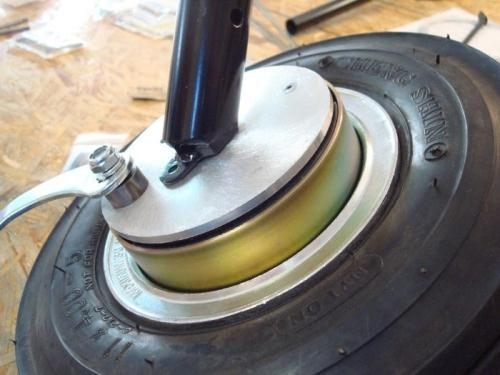
Just slipped the parts onto the axle - perfect fit
|
|
|
|
|
|
|
|
|
Copyright © 2001-2024 Matronics. All Rights Reserved.
|