
|

|
|
|
Zenith CruZer & Sonex Logs
|
Date: 11-12-2010
|
Number of Hours: 2.00
|
Manual Reference: aerovee
|
Brief Description: Rods / Cam Bearings / Studs
|
|
Sonex recommends that you follow the manual, regarding the steps in building the engine leading up to setting the crank end-play.
So, today, I installed the connecting rods. Since they were all cleaned and inspected, I just had to press the rod bearings into the connecting rod halves and coat them with white lithium lube. I then lubed the crankshaft journals as well, and hand-tigthed the nuts.
One all the rods were in place, I then removed the nuts on one rod at a time, applied red loctite, and torqued. I first torqued to 10 ft lbs, then 25 ft lbs, as per manual spec.
I then installed the oil relief valve and oil control valve in the crankcase.
I installed the cylinder studs into both halves of the engine case. These only go in hand-tight.
I installed thick o-rings around the size inner case studs to help seal the case when assembled.
I opened up the cam bearings. The front bearing in the right side of the case has to be modified. The case does not have a notch in it to hold the bearing notch, so you must file the backside of the bearing notch flush so it will fit in the case (see pic 2 below).
|
|
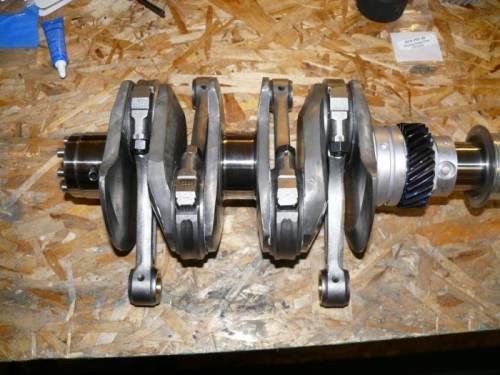
Rods Installed
|
|
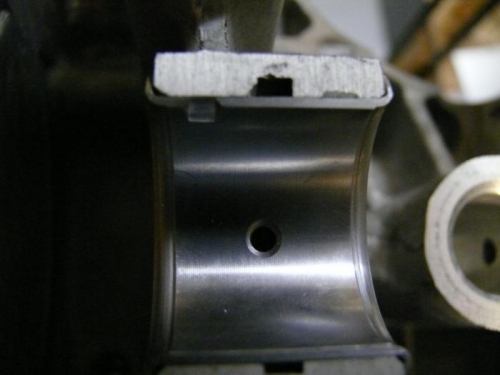
Special Cam Bearing
|
|
|
|
|
|
|
|
|
Copyright © 2001-2024 Matronics. All Rights Reserved.
|