
|

|
|
|
Eddie's Zodiac XL Project
|
Date: 2-12-2006
|
Number of Hours: 2.00
|
Manual Reference: 6-W-2
|
Brief Description: Cutting the flex hinge and fitting a normal hinge
|
|
After getting home from the SAAA meet Tom Poberezney (think that how he spells his surname) function. As an aside, Tom was very entertaining and had some great stories to tell about fly aerobatics, traveling all over the USA in a Pitts Special to attend competitions when he was younger (he has nearly 7000 hours logged in Pitts Specials and Christan Eagle's), the current direction of the EAA and Sport aviation, spending time with Mike Melville and Burt Rutan before and after they won the Ansari X-Prize, the first civilians into space, truely spine tingling stuff .It's amazing, people that are really great at what they do, seem to have such a relaxed air about them, no need to brag or prove anything, just quiet confidence. I decided to finish the removal of the flex hinge and fitting of a normal aircraft hinge to the left aileron. There have been varying reports about the difference in feel of the flex hinge compared to the normal hinge, the camps seem to be split 50/50 and as always you need to weigh up the options and make your own decision. The one factor that swayed me was the fact that with the flex hinge the aileron trim servo would be under much more load than it would be if a normal hinge were fitted, so for me this helped make my decision, otehrwise I think the idea itself is fabulous and it also provides the perfect gap seal, but then again so does glider tape. Anyway enough rambling, the left aileron is now ready to be disassembled for deburring, dimpling, counter sinking of the hinge and corrosion protection with Cortec, before I can re-assemble and rivet. After that I can start the wings!!!
|
|
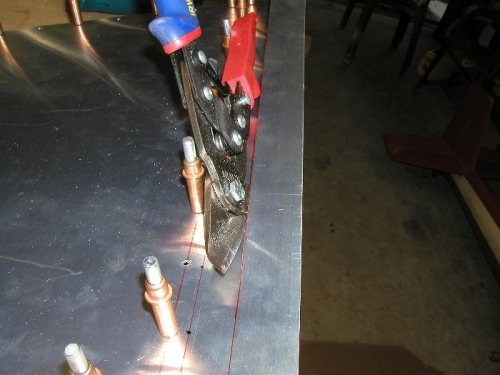
Cutting off the excess material from the flex hinge so that I can fit a standard hinge
|
|
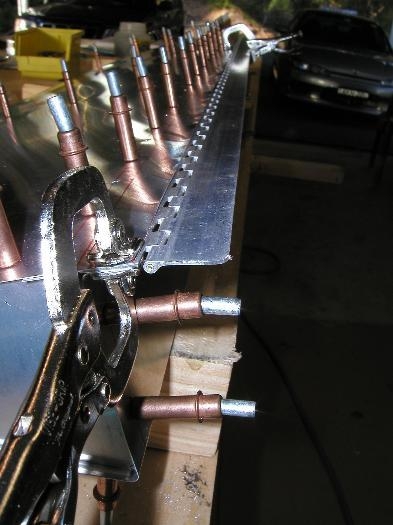
Hinge clamped in place with a supporting L angle on the underside
|
|
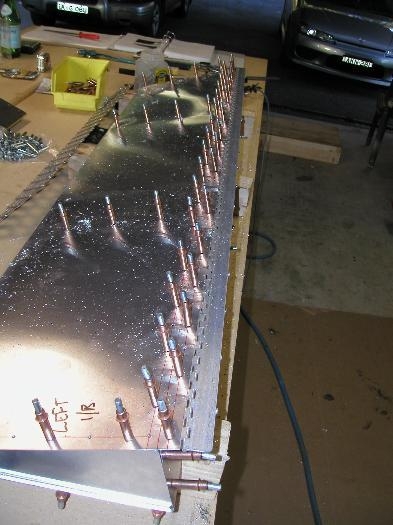
Hinge and L angle back drilled with #30 drill bit ready for dimpling and counter sinking
|
|
|
|
|
|
|
|
|
Copyright © 2001-2024 Matronics. All Rights Reserved.
|