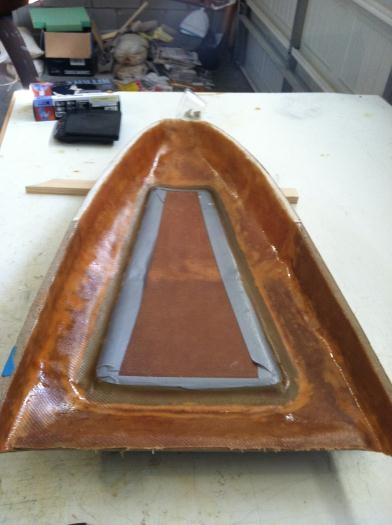
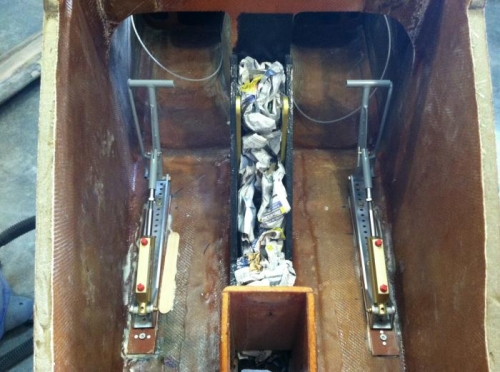
The nose hatch was JUST cured enough to do some knife trimming so off those trimmings went.I will, however, wait for a FULL cure before attempting to pound out the hatch. Next came the installation of the pedal rail hard points. First, the nutplates have to countersink into the floor so 3 holes per side were drilled into the glass to allow these to sit flush with the floor. The directions state that you need to cut out the floor and build up a flox bed that is level in order mount the pedals level. I, however, built the floor level to begin with so I decided to flox the hard points right to the floor itself. This will create a small shelf that the pedals will be bolted to but no big deal. After doing my religious vacuum and acetone wipe I floxed the area with 15 minute epoxy and filled the holes. I then placed the pedals and hard points rail into the determined locations and let the flox set up. I then unbolted the pedal rails from the hard point phenolic and let the epoxy completely cure. The reason I installed the whole unit during cure was to make sure that no epoxy got into the but plate threads. This worked wonderfully. Now I set the pedals aside and sanded everything down to 220 girt and did another acetone wipe. I then decided instead of 3 layers BID to use 2 layers BID on top of one layer of UNI... I could just see myself running out of runway someday and STANDING on the pedals to stop so the added strength of the UNI will be a little more insurance. After laying up the 3 plies on both sides, I peel Plied the borders and will let this cure overnight :)