
|

|
|
|
RV-6A - GBC
|
Date: 1-25-2007
|
Number of Hours: 3.50
|
Manual Reference: Step Option
|
Brief Description: Prelim fitting - left step option
|
|
This one needs more work - but the initial fitting is done.
The instructions for the Left Step included a pattern (guide) but it was for the Right side. I scanned, flip-flopped and printed it to get a reverse image. With a little fiddling around, I settled on a starting position and drew a circle using the UMHW block for size. Then used the 12" #30 drill to put a pilot hole through the skin and F-623 rib. Enlarged the skin hole with the Unibit and then re-adjusted the pattern a little lower to get the desired alignment, using a framing square to get a 90deg mark across the ribs to the pilot holes.
I used a rasp on an electric drill to enlarge the skin hole, double-checking alignment during the process. Used snips and nipper to trim down the flanges on the floor. Then used the UMHW block to draw a cricle on the F-623 rib, drilled a circle of #30 holes around the perimeter and knocked out the plug. Used the rasp again to clean-up the holes and fit the step tube through the skin & rib.
The tube is about 3/8ths" short of fitting into the UMHW block all the way, but when the plate is bent to conform to the skin, and riveted tight, it should close the gap. It will still be a tight fit to get adequate tube insertion before drilling the final bolt hole. And, based on email from Vans, I might try some re-inforcement ideas.
|
|
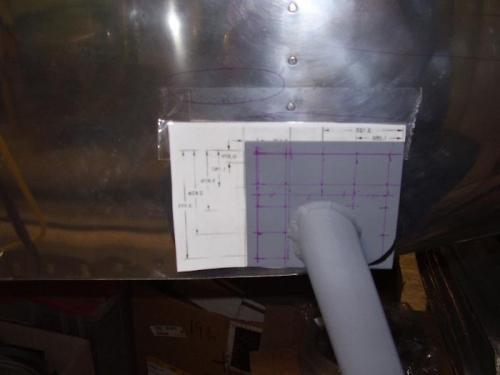
Pattern - step inserted
|
|

Tube inserted
|
|
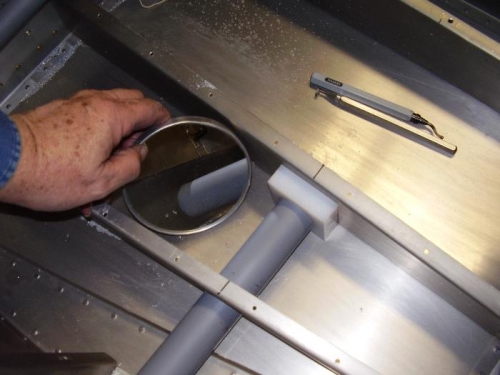
Tube aligned
|
|
|
|
|
|
|
|
|
Copyright © 2001-2024 Matronics. All Rights Reserved.
|