
|

|
|
|
RV-6A - GBC
|
Date: 7-6-2015
|
Number of Hours: 2.50
|
Manual Reference:
|
Brief Description: Panel - nutplates
|
|
Time consuming and tedious at best, aligning, marking, drilling, aligning, drilling and counter-sinking (oh and deburring). Looking good but almost too bare compared to some new airplanes today.
Added the #6 nutplates for the SV-Comm radio head, and SV-Intercom. Luckily have the tool for drilling the 'one arm' nutplates HA HA. No, but the 1st hole in the one-arm is the same as the 1st hole in the 2-holer. So, used the tool first and then used the nutplate (clecoed on) as a template for the 2nd hole.
Eight holes, for screws, 24 holes total, and 16 of those are C/S for flush rivets. The edge distance on the SV-COMM is very minimal and leaves no room for fudging the alignment. Then countsunk all the top curve holes for the angle to be riveted (another day), another 30 +/- holes.
Removed the blue 'protective' plastic and found some minor spots of corrosion - and it's a recent acquistion. Plastic was not 'uniformly' sealing the surface. Will have to treat and stop that.
NOTE: See 12-3-11, for info - researched the 'lost mount' today to replace it. Assembly is LORD MOUNT J-6230-1 (without the engine bolt)., the 'cushion alone' is J-6113-1. [Bellanca used these] There is additional 'clocking' information available to align these, too.
|
|
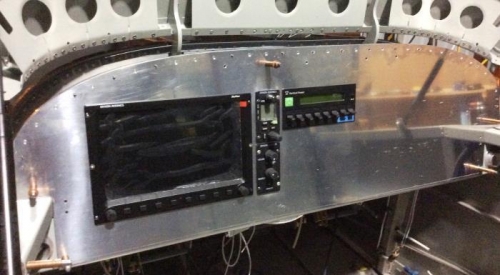
Bare metal & fastened
|
|
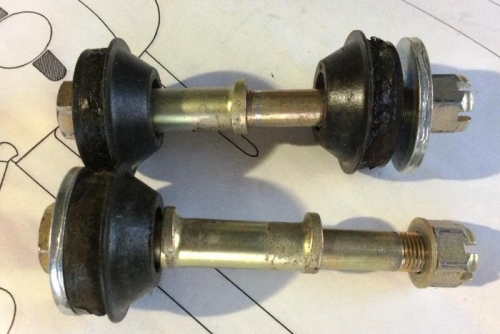
Lost 1 of 2 ISO cushions from mount
|
|
|
|
|
|
|
|
|
Copyright © 2001-2024 Matronics. All Rights Reserved.
|