Brief Description: Assemble L-Tank with Stiffeners and Ribs
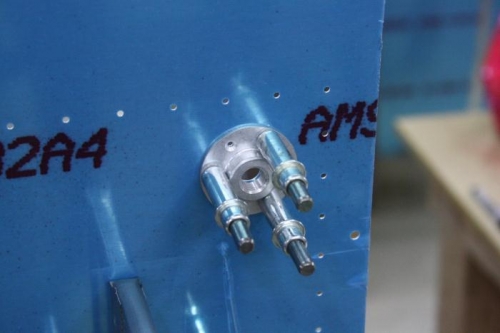
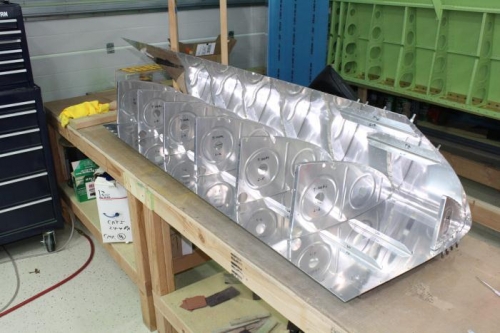
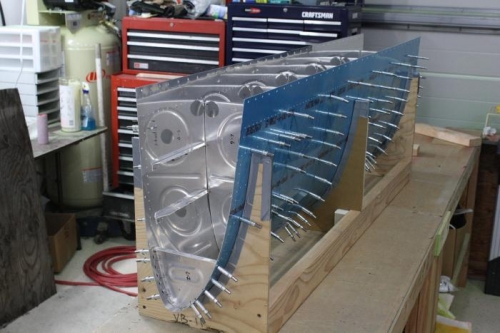
18-2: Step 5: Clecoed all the T-1011 Tank Stiffeners and the VA-112 Drain Flange to L-Tank Skin and final drilled related holes. Step 6: Added a third rib to my Leading Edge Assembly cradle to support the center section of the tank. Refit Ribs as required and clecoed them into place. Marked as to location in the Tank. The assembly was difficult to get the ribs into place. I removed most of the Ribs and fluted the lower nose flanges to get the last hole on the bottom to align with the skin. Rechecked and adjusted fluting and square flanges multiple times until I got ribs to set correctly and align with skin holes. Clecoed in the bottom skin to Ribs first then did the top of the Tank by starting with a cleco in the hole closest to the spar and worked my way in to the nose of the Rib. Still very tight but aligned ok when finished. The Skin shaping as delivered does not seem to match th contour of the Ribs perfectly so some coaxing is required to get them into place.