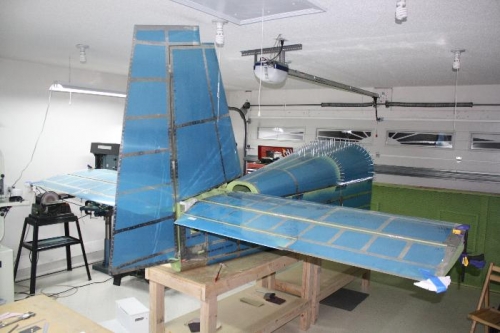
11-7: Step 8: Installed and tightened Rudder AN-3 hardware and checked for binding and proper 35 deg travel left and right. Step9: Tightened rod end jam nuts and removed Rudder. Checked jam nuts for tightness and applied torque seal. Stored Rudder in my office.
11-8: Step 8: Installed AN470AD4-4 rivets in close-out flanges.
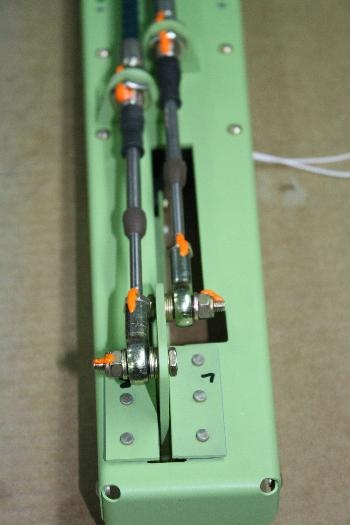
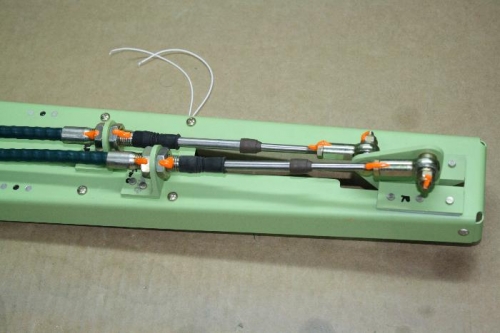
11-9: Step 5: Installed Elevator Trim Cables through Trim Cable Anchor Brackets. Adjusted trim cable jam nuts it center position.. Step 6: Attached threaded ends of Elevator Trim Cables to the Trim Bellcrank using the MW-3M rod ends with AN3 hardware.
11-10: Step 1: Using 9 volt battery, ran Trim servo to full retracted position and adjusted Trim Cables and associated rod ends to match maximum cable extention. Ran Trim assembly through full range and checked for binding and proper adjustment. Ended up tightening the castlated nut on trim bellcrank one notch to prevent lateral movement of bellcrank under load. This was important to keep bellcrank from hitting the sides of the bellcrank brackets when applying load to the trim cable ends that connect to the actual trim tabs.