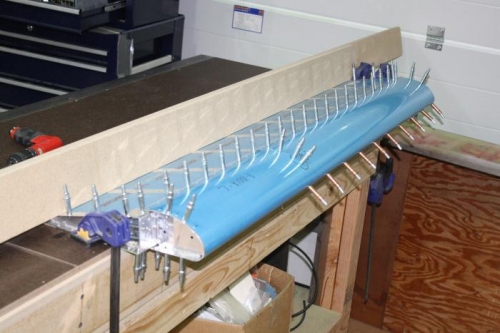
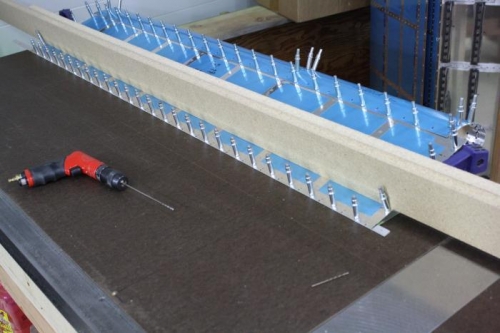
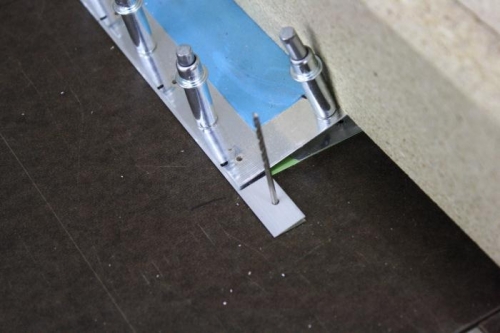
21-4: Steps 2 - 7: Followed the instructions as directed. The noteworthy information included getting the aileron flat on the build table and then match-drilling holes. I used the torsion table I had built previously, checked for any twist after removing the cardboard working cover. Used boards as recommended to hold aileron flat on the table but found I needed to add some clamps to finish pulling them flush. Found there was a tendency for Nose Skin to bow up some which caused the spar to bow forward and wrinkle the skins somewhat. I checked them with a straight edge and used my hands to squeeze them into shape to reduce bulging. Got them pretty close and the skin wrinkling was minimized. There is some technique here to readjust the clamps and end rib spread so the skin wrinkle was minimized. I used the 1x4 particle boards left over from the torsion box because they were straight and gave me a better compression than 2x4 lumber which was alway bowed. Trailing edge drilling and clecoing was done right into the table. I started at the middle and worked my way out to the edge ribs ensuring no wrinkling or waving of trailing edge of skins. Came out flat and then drilled as recommended perpendicular to the center line of the TE extrusion. I estimated by inserting a #42 bit upside down in an adjacent hole and then estimated half that angle from perpendicular to the skin. Note: test the extrusion hole angle and pick the side that best matches aligned holes of the TE of skins.