I'm putting in flush handles from iflyrv10.com and the door safety latch from planearound.com. This will cause me to jump around plans from Van's, Iflyrv10.com, and Planearound.com to install these customizations.
From the iflyrv10.com flush handle plans:
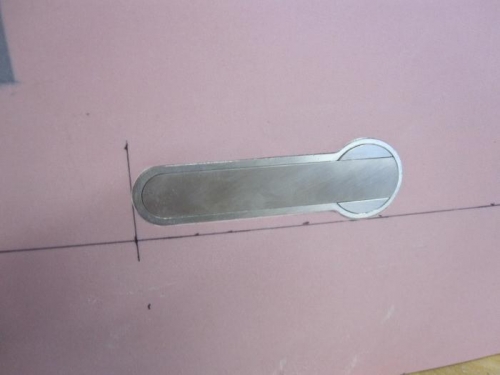
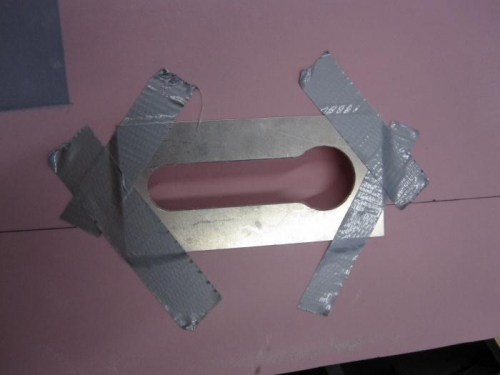
Draw a horizontal parallel line 6 3/4” down from bottom edge of window edge. Draw a parallel vertical line 4 1/4” from rivet line. Place Template on intersecting lines and duct tape in place. Using dremel or similar, cutout handle slightly undersize. File to final fit now or wait until access is made from backside for final fitment. Ideally the closer the fit the better.
Inner door cutout for handle is approx. 2” x 4” Measured 5” from aft edge of door and 3” from bottom edge of door. Cut interior access hole. Final fit Billet Handle into cutout, trimming as required to get desired fit. Glue with epoxy after roughing exterior door skin and handle body to ensure adhesion. You may also add a small strip of 1/2” wide fiberglass tape along the perimeter of the handle to insure complete bonding
Draw a centerline from the aft edge of the door to the inside door latch directly above the aft pushrod to give a reference line. Cut a hole 5 1/2” x 1 1/2” starting 8” from aft edge and centered over pushrod.
From the planearound.com safety latch plans:
Measuring from the interior front corner of the door, make a mark at 18-3/8 inch. This will be the center of the gearbox slot. Cut a 13/16 inch by 2-3/16 inch slot on the bottom of your door centered on the 18-3/8 mark (just enough to slide in your gearbox against the interior skin). Do not cut into the exterior skins. Measuring from the interior skin, mark a center drill hole 29/32 inch up from the bottom of the door. Using the mark from step 2.2, drill a 1/2 inch hole with a step drill for the shaft. Slot the fiberglass from the 1/2 inch hole to the bottom of the door to join the slot. Now you can see how the assembly will slide up into place.