
|

|
|
|
Bob Leffler's RV-10
|
Date: 11-8-2009
|
Number of Hours: 1.00
|
Manual Reference: 40-2, 40-3, 40-4
|
Brief Description: Flap Torque Tube and Flap Crank
|
|
40-2, Steps 1, 2, 3, 4, 5, & 6
Slide a WD-1013C Flap Torque Tube into the WD-1013A Flap Crank and align them by using the pre-drilled holes. Cleco the WD-1013C Flap Torque Tube to the inboard most set of holes in the WD-1 013A Flap Crank. Match-Drill the flap torque tube. Match-Drill both 1/8 diameter holes from the outside in, using the pre-drilled holes in the flap crank as guides. Bolt the WD-1013A Flap Crank to the WD-1013C Flap Torque Tube; Remove the clecos. Install a second set of hardware like the first in this hole. Slide a WD-1013B Flap Horn into the WD-1013C Flap Torque Tube. Drill a 1/4 dia. hole in the W-730 Bellcrank Jig.
40-2 Completed per plans.
40-3, Step 1
Clamp the WD-1013A Flap Crank to a flat table. Bolt the W-730 Bellcrank Jig to the WD-1013B Flap Horn. I managed to misplace my jig and borrowed one from Rick Gray. This will set the angle of the flap horn relative to the flap crank. Set the lateral position of the flap horn. Clamp the flap horn into this position using a vise-grip placed over the inboard set of 1/8” diameter holes. Leave this vise-grip in place while removing the other clamps holding the assembly to the table. Match-Drill #30 the flap horn using the outboard set of 1/8 diameter holes in the WD-1013C Flap Torque Tube as guides. Continue drilling to final size as per the callout. Insert hardware. Remove the clamp.
40-3 Completed per plans.
40-4, Steps 1, 2, & 3
Bolt the WD-1013B Flap Horn to the WD-1013C Flap Torque Tube. Match-Drill #30 the flap horn at two places using the torque tube as a guide. Drill #12 then final-drill 1/4. Mark the parts so they can be reassembled as drilled and identified as the parts to be used on the left side of the aircraft. Disassemble and deburr all parts. Repeat Steps for the flap torque tube and flap horn on the right side of the plane. The right side is the mirror of the left.
|
|
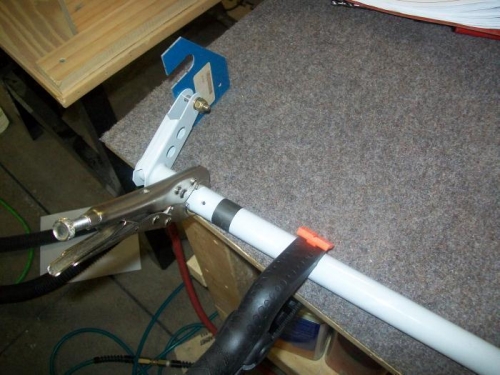
Bellcrank Jig and the Flap Horn
|
|
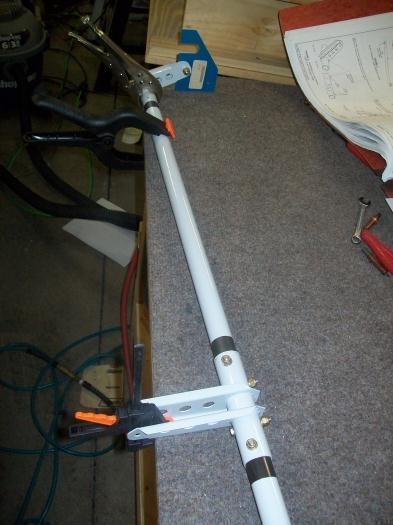
Flap torque tube clamped to the work table
|
|
|
|
|
|
|
|
|
Copyright © 2001-2024 Matronics. All Rights Reserved.
|