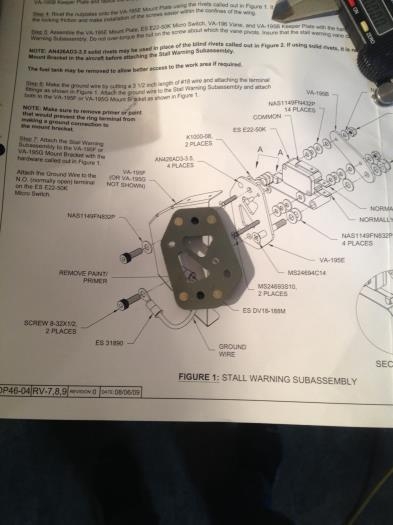
Brief Description: Installing Stall Warning System
Final-Drilled #31 the holes in the VA-195E Mount Plate and VA195B Keeper Plate that are used to mount the ES E22-50K Microswitch. Machine countersunk VA-195E for the head of a #40 screw. Final-Drilled #19 the hole in the VA-195E Mount Plate and VA-195 that holds the #8 screw on which the VA-196 Vane pivots. Machine countersunk this hole in the mount plate for the flush head of a #8 screw. Machine countersunk both sets of the nutplate attach holes in the VA-195E Mount Plate. Deburred all holes and edges on the mount plate and the VA-195B Keeper Plate. Radiused the sharp corners on the VA-196 Vane. Primed the parts. Riveted the nutplates onto the VA-195E Mount Plate. Assembled the VA-195E Mount Plate, ES E22-50K Microswitch, VA-195 Vane, and VA-195B Keeper Plate along with the hardware necessary in order to create the Stall Warning Subassembly. Insured that the stall warning vane rotates freely. Placed a dab of Torque Seal in each of the three nuts/screw combination. Made the ground wire by cutting approximately 3 1/2" lenght of #18 wire and attached the terminal fittings according to plans- Figure 1. Attached the Ground Wire to the N.O. (normally open) terminal on the ES E22-50K Microswitch.
Parts primed and with nutplates installed
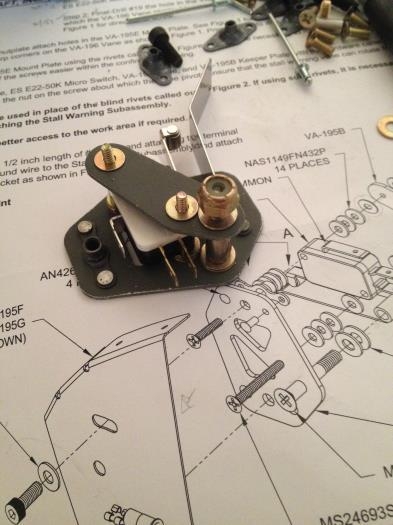
Stall Warning Subassebly with Microswitch and vane, ready to close with screws and nuts
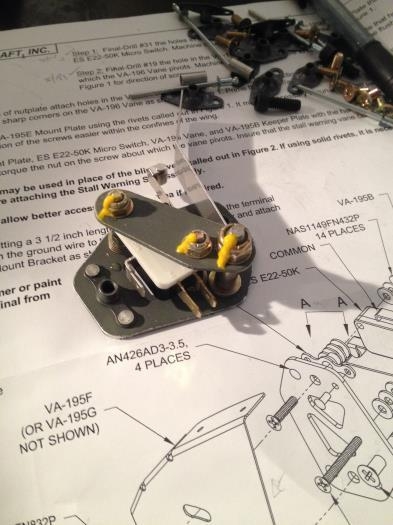
Finished Stall Warning Subassembly with Torque Seal applied to nuts and screws.