
|

|
|
|
RV-7 Construction Log
|
Date: 9-8-2013
|
Number of Hours: 6.50
|
Manual Reference: p 8-5
|
Brief Description: Aft Fuselage
|
|
I'm not quite ready to drill the aft fuselage yet, but I AM closer than I was yesterday. After several hours of removing and installing the tail spring mount, adjusting the bottom tabs on the F-712 bulkhead, and installing and removing that bulkhead I FINALLY noticed that the inboard tabs on the aft portion of the bulkhead slightly overhanging the slot for the tail spring mount, my first indication that they were interfering with the tail spring mount, and holding the bulkhead off of the bottom skin. I used my die grinder with a 1/4" burr to relieve the edges of the tabs (photo 1). I also opened up the mouse hole in the 712 bulkhead as well as the slot in the bottom tail skin for better clearance for the mount.
Before I got too far along, I thought it would be a good idea to open up the tail spring bolt access hole. I opened up the pilot hole to 5/8", a good clearance size for a 7/16" socket. What I didn't allow for was the angle of the tail spring causing the bolt to angle forward somewhat (photo 2). I enlarged the hole to 3/4", but the extra 1/16" wasn't nearly enough. I ended up elongating the hole forward about another 1/8" to be able to get the socket on the nut. If I had this to do over, I would have pilot drilled this hole from above through the tail spring mount, then enlarged it to fit the socket. Hopefully a lesson learned...
Most of the fitting I've done so far has been WITHOUT the F-786C J-channels in place so I could use clecos to wedge the tail bottom skin into place so its upper holes would line up with the lower holes in the side skins. With those J-channels in place I can no longer get the tail bottom skin to line up properly. I tried several methods to push this skin into place, but didn't come with a one that would work. I think what I'm going to do is to predrill those J-channels to the side skins slightly undersize (3/32" rather than #40) so I can again use clecos to wedge the skin into place.
|
|
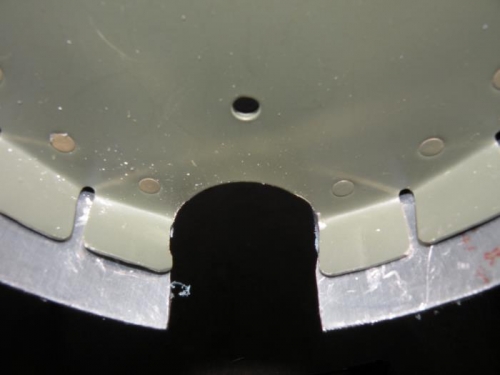
Relieved the inboard tabs and the mouse hole for a better fit for the tail spring mount.
|
|
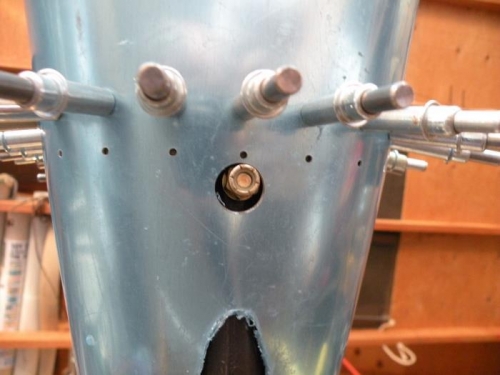
The first cut at drilling the access hole for tail spring nut.
|
|
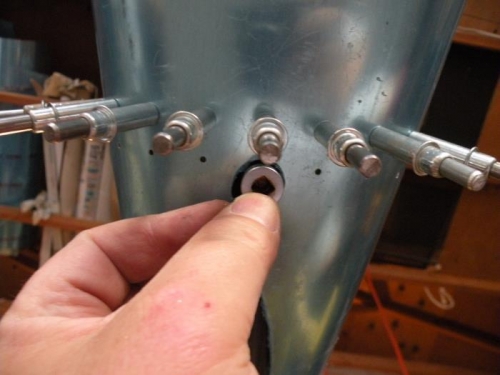
I elongated the hole about 1/8" for a better fit.
|
|
|
|
|
|
|
|
|
Copyright © 2001-2025 Matronics. All Rights Reserved.
|