
|

|
|
|
RV-7 Construction Log
|
Date: 4-12-2014
|
Number of Hours: 7.00
|
Manual Reference: p. 8-8, 8-9
|
Brief Description: Forward Fuselage
|
|
I started the day by radiusing the top and bottom edges of the left F-7101 gear attach web so that it will nest properly in the lower and auxiliary longerons. I then drilled the top and bottom tabs on the left forward bulkhead to main and lower longerons.
The next step was to match drill the forward bulkheads through the forward flange of the gear attach webs. However, I couldn't get a drill and bit positioned properly for this job, so I clamped the two parts together in place, then removed the assembly for drilling (photo 1). Worked like a charm.
I then got started on fabricating the reinforcement angle and shims for installing the fuel tank attach brackets. The first angle I made seemed way too long, but I had misunderstood the location. Once I figured out where it is supposed to go I discovered I had made the end angles in the wrong direction. The next one I made fit just fine.
The instructions and plans have you pre-drill the top hole to #30. Instead, I just held the angle in position with the aft edge of the leg butted up against the web of the forward bulkhead while I used a #30 bit through the existing holes in the skin and auxiliary longeron to mark the hole position on the outboard face. I finished the hole on the bench, clecoed the angle in place in the fuselage, then repeated the process for the bottom attach hole through the lower longeron. I then fabricated the shims, pre-drilled the top hole, then inserted a #3 reduced head rivet from the outside to hold their position. I then clecoed the angle in place and match drilled the three #40 holes through the whole assembly. Repeat for the left side.
With the shims and angle clecoed in place through the three #40 holes, I drilled the top and bottom holes out to 3/16. I then drew a centerline between the bottom two #40 holes, inserted reduced head rivets through all three #40 holes, bolted the steel attach bracket through the top hole, located the bottom hole over the center line, and match drilled 3/16 through the whole assembly.
.
|
|
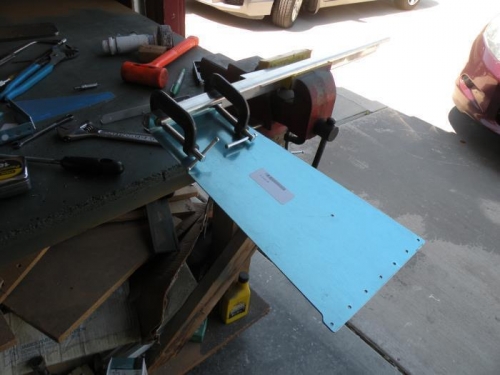
Match drilling the forward bulkhead through the gear attach web.
|
|
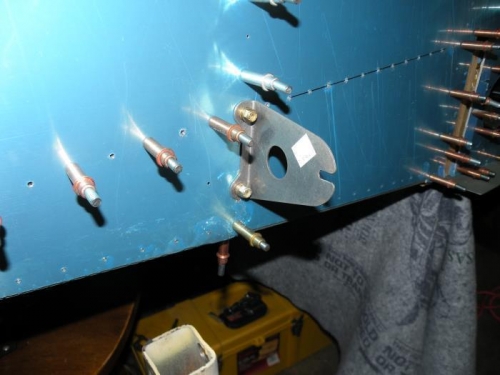
Trial fit shows all parts fitting well.
|
|
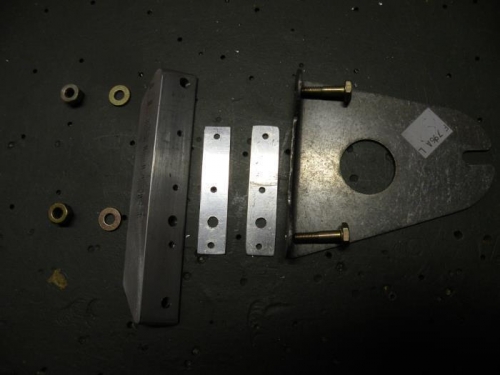
All of the parts required for installing the left fuel tank attach bracket.
|
|
|
|
|
|
|
|
|
Copyright © 2001-2024 Matronics. All Rights Reserved.
|