
|

|
|
|
RV-7 Construction Log
|
Date: 3-17-2013
|
Number of Hours: 8.80
|
Manual Reference:
|
Brief Description: Conduit, Ailerons, and one Flap - Part 1
|
|
HAPPY ST. PATRICKS DAY!
I started the day by installing the second conduit in the right wing. VERY easy after all the trial and error yesterday!
EDIT: DO NOT INSTALL A CONDUIT IN THIS LOCATION!!! IT WILL INTERFERE WITH THE W-818 AILERON PUSH ROD. :O(
I then mounted the aileron on the left wing. It took a bit of trial and error fiddling with the washers, and I ended up gloving up and using EZ Turn (fuel lube) to stick the washers together so I could insert each set as a unit. The spacer on the inboard hinge turned out to be 0.595, about 1/16 wider than the 17/32 estimate on the plans.
Next was fitting the left flap. Because the flap and aileron hinge lines are in different chordwise locations, I set the aileron in its neutral position so its trailing edge would properly serve as a reference for the trailing edge of the flap. Insead of the wood fixture shown in the plans, I used a taught thread between the aileron trailing edge radius and the forward tooling hole. I taped and clamped a long 3/16" bolt to the trailing edge, and tied one end of a length of nylon thread to it. I tied the other end to a 3/16" cleco. The length of the thread was several inches shorter than the distance from the trailing edge to the forward main rib tooling hole, so it could be stretched, thus making it "straight as a string"(Photos 1 & 2). I used a clamp to adjust the aileron position until the string centered in the main rib aft tooling hole.
After clecoing the bottom skins on, I aligned the flap to the aileron by taping half of my 4' carpenter's level to the flap such that the trailing edge of the flap nested in the groove on one edge of the level. I clamped the flap hinge in place such that the aileron trailing edge nested in the groove in the outboard half of the level. I used 1/4" bolts to set the spanwise gap between the two control surfaces. (Photo 3)
(Continued in the Next Entry)
|
|

My nylon thread alignment tool.
|
|
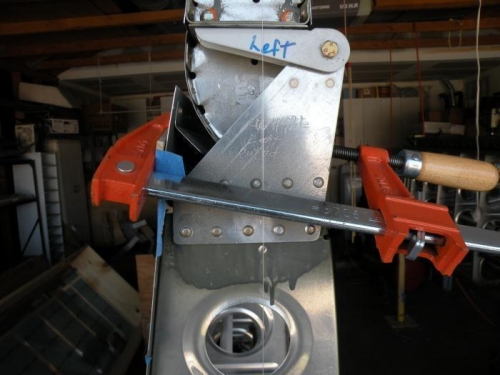
Closeup showing the thread splitting the main rib aft tooling hole.
|
|
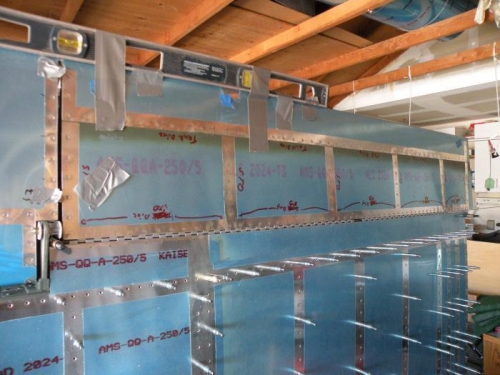
Flap clamped in place ready to drill the hinge.
|
|
|
|
|
|
|
|
|
Copyright © 2001-2024 Matronics. All Rights Reserved.
|