
|

|
|
|
RV-7 Construction Log
|
Date: 7-1-2012
|
Number of Hours: 6.90
|
Manual Reference: p 7-6
|
Brief Description: Fuel Tanks
|
|
Today, I fabricated the T-405 forward attach angles for both tanks and drilled them and the T-410 nose stiffener plates to the inboard tank ribs. I drilled the outboard nose stiffeners for both tanks to their respective ribs as well.
I don't have a circle template or a drawing compass, so Karen made me a 2" stiff paper circle on her Cricut for tracing the 1" radius of the arm of the angle that attaches to the fuselage bracket. I made the 1/4" radii at the base of that same side of the attach angle by pilot drilling #40, stepping up to 3/16, followed by a unibit to the 1/2 diameter. The steps of the unibit are only 1/8" tall and the material is 3/16", so I finished the hole with a 1/2" twist drill.
I laid out the rib nose shape by tracing the outline of a T-410 rib stiffener. Since the layouts were on the outside faces of the angle, I cut them on the bandsaw by clamping the angle to a 2x4 block. I REALLY need a finer bandsaw blade, as cutting the 3/16" stock went very slow, and the part got very hot. Using Boelube (stick type) helped the cutting greatly, but the melted Boelube dissolved the Sharpie marks. Who knew!? Remarking the lines with a scribe solved that problem, but it was a bit difficult to follow the very fine line. I was able to saw within 1/32" of the line, though, getting the final shape with my belt sander, followed by smoothing with the Scotchbrite wheel.
When sawing the second angle out of the stock, I misread my ruler and cut it 1/4" too short. Rats! Fortunately, there was enough stock left to cut another one. I don't know if there are any other parts requiring that stock, but if there is, I hope 3-1/2" is enough...
(Continued next entry.)
|
|
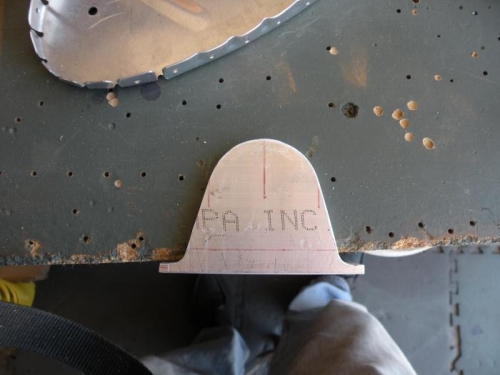
Shape of the portion of the attach angle that attaches to the fuselage bracket.
|
|
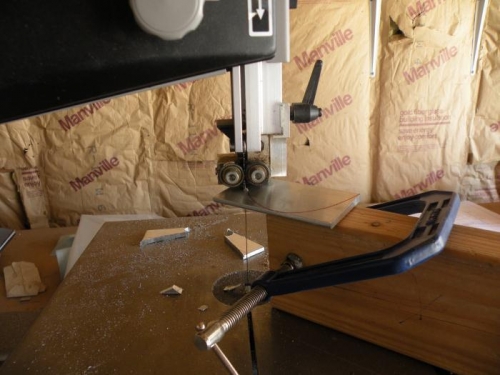
Jig for sawing the attach angle shape.
|
|
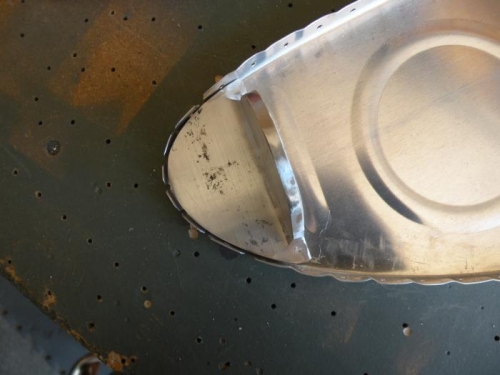
I located the angle further aft than this shows to allow clearance for skin rivet shop heads.
|
|
|
|
|
|
|
|
|
Copyright © 2001-2024 Matronics. All Rights Reserved.
|