
|

|
|
|
RV-7 Construction Log
|
Date: 5-18-2012
|
Number of Hours: 4.60
|
Manual Reference: pp 7-2, 7-3
|
Brief Description: Tiedowns and Ribs
|
|
Finished prepping, primed, and assembled the tiedown and spacer bars. On the bottom right spacer, I had countersunk the wrong side of the spacer bar and it wouldn't fit. Since the rivets on this part aren't heavily loaded, I just turned it over and countersunk the correct side. Worked fine. I would have installed the bars on the spars, but my torque wrench is at the airport and I didn't feel going just for that one item.
Between priming and assembling the tiedowns, I got started on the main rib deburring by doing the flanges on the 6-inch scotchbrite wheel on my bench grinder. After assembling the tiedowns, I deburred the lightening holes using a 2-inch scotchbrite wheel in my die grinder. Both the flanges and lightening holes went fairly quickly. Not so with deburring the notches. Using my needle files, emery cloth (actually, remnants of a worn out sanding belt), and maroon scotchbrite, it took about an hour and a half to get through seven of them. :O(
Rivets this session: 16
Rivets Total: 2641
|
|
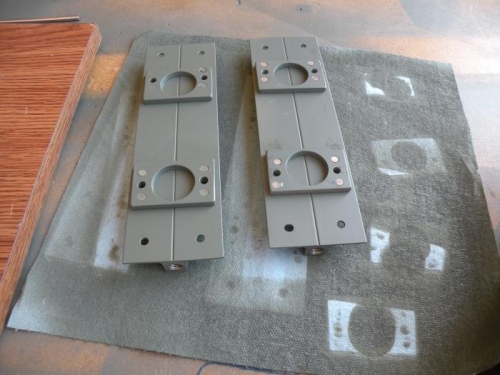
Tiedown/spacer bars complete.
|
|
Initial setup for deburring lightening holes. I ended up just holding the rib in my left hand.
|
|

Seven out of 28 with the notches and small holes deburred.
|
|
|
|
|
|
|
|
|
Copyright © 2001-2024 Matronics. All Rights Reserved.
|