
|

|
|
|
RV-7 Construction Log
|
Date: 2-25-2012
|
Number of Hours: 0.00
|
Manual Reference:
|
Brief Description: Elevator Work - Continued
|
|
Next, I dimpled the right elevator skin, which had been prevously de-vinyled and deburred. I then devinlyled, deburred, and dimpled the left skin. The trim spar holes outboard of the trim cutout were a bit of challenge, but I was able to get them dimpled with the DRDT-2 by removing the tables, which interfered with the stiffeners. I was able to get the aftmost holes in the skins for the tip ribs with the same setup I used for the rib itself, taping the female pop rivet die to my no-hole yoke.
I didn't see it in the instructions, but I went ahead and drilled out and dimpled the holes in the right elevator main skin used to attach the fiberglass tips to #30, as the instructions suggested for the rudder. I also drilled and dimpled the corresponding holes in the counterbalance skin. I'll need to remember to do the same for the left skin.
Per the instructions, I riveted the right counterbalance to the main skin before inserting the skeleton, using two rivets each, top and bottom. These particular rivets are set now, as they would be inaccessible after inserting the skeleton and would require blind rivets.
I think the right elevator is ready for riveting the skin to skeleton. The only possible exception might be the removal of some of the lead from the counterweight. The instructions have the lead weight installed loosely before inserting the skeleton in the skin, but if the counterweight can be installed after the skeleton, I'll wait to remove the extra lead after riveting. If not, of course, I'll trim the counterweight before riveting.
|
|
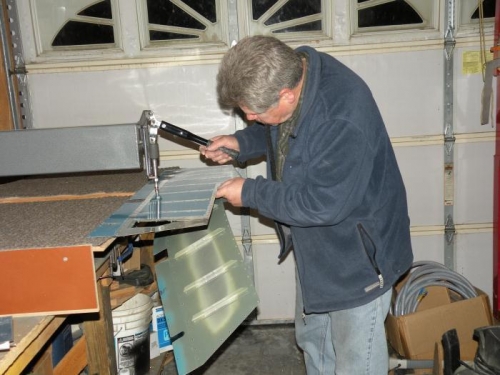
Dimpling spar rivet line on the left elevator skin.
|
|
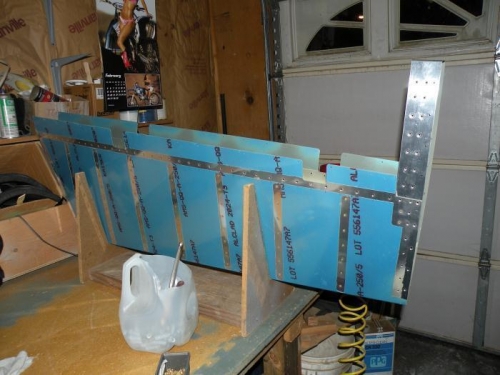
Two rivets top and bottom holding the counterbalance skin in place. Ready for the skeleton!
|
|
|
|
|
|
|
|
|
Copyright © 2001-2024 Matronics. All Rights Reserved.
|