
|

|
|
|
RV-7 Construction Log
|
Date: 2-11-2012
|
Number of Hours: 1.50
|
Manual Reference: P 6-7
|
Brief Description: Session 1 - Rudder Assembly - Part 8
|
|
Prosealed the trailing edge of the rudder. I didn't have help, so stealing an idea from another builder, I held the skins open with a piece of twine suspended from a rafter, as shown in Photo 1. The weight of the rudder opens the skins just enough to get in for scuffing, cleaning, and insertion of the AEX wedge. I couldn't find my stainless steel brushes, and scotchbrite didn't get the surfaces rough enough to suit me, so I used 100-grit aluminum oxide sandpaper to scuff the skins and AEX wedge. I then solvent wiped several times until the rag came up clean.
I applied the proseal with an acid brush trimmed down to 1/4 inch, which made the brush stiff enough to spread the proseal into a fairly thin layer. I applied the first layer to the bottom skin, as shown in Photo 2. Next, I inserted the AEX wedge and applied a layer of proseal to the top of that, then 100% clecoed the two angles through the whole assembly. Hopefully this will result in a very straight trailing edge with no pillowing between rivet holes. I moved the assembly into the (warm) spare bedroom for a couple of days to allow the proseal to cure.
The batch of proseal was 17.5 grams, and weighed 7 grams after applicaton, so it took just over 10 grams to do the job.
|
|
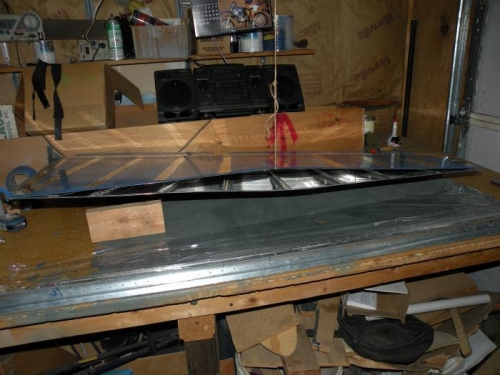
Working solo required stealing an idea from another builder.
|
|
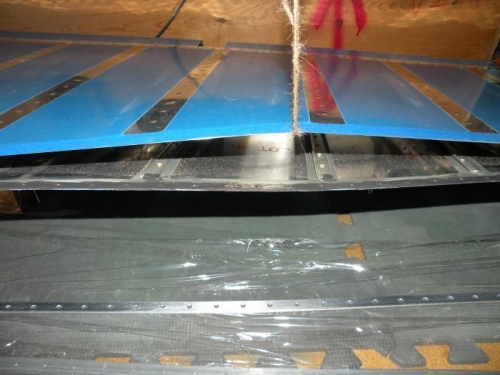
First layer of proseal applied to bottom skin trailing edge.
|
|
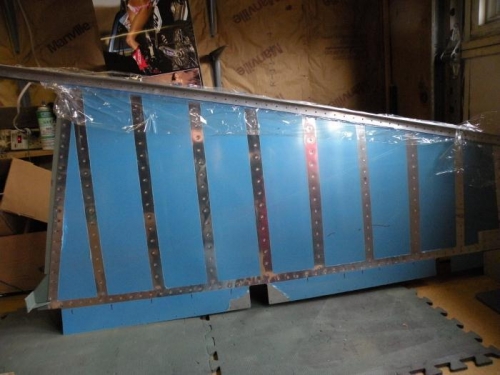
Trailing edge gluing complete and 100% cleoed between two angles.
|
|
|
|
|
|
|
|
|
Copyright © 2001-2024 Matronics. All Rights Reserved.
|