
|

|
|
|
Building Integrity
|
Date: 7-28-2014
|
Number of Hours: 8.00
|
Manual Reference: Section 2
|
Brief Description: Plenum filler and Oil Cooler location
|
|
The oil cooler bracket was welded up by my friend Matt, who does nothing less than professional work. The correct fittings are in the mail so I'll wait till they arrive before I start tightening things up.
In the meantime, I need to start the "not fun" job of filling and sanding the plenums. I am going to need at least 2 rounds if not 3 or filler to get them ready for paint. The 3 rounds of filler have become standard in this build, but it always amazes me, no matter how small the project is, it always takes soo much time to fill and sand. In fact, today I only got through round 1 before getting worn out, however, round 1 is 80% of the work so it's all down hill from here.
I also decided to clean up and prep the right plenum that was only glassed yesterday. We had a heat wave come through that turned up the temps in the shop to 86 even at night which made for a quick cure. As always, removing the glass, tape and foam, sanding it up and prepping for filler was a good 3 hours. I also determined that I could add a little filler to the inside of the plenum inlets to create an even smoother contour for better airflow.
I did a funny little test and installed them onto the engine. I put the shop vac on "blow" mode and placed the nozzle inside the inlet just for kicks. I noticed that the majority of the air was coming out the bottom towards the back which means I may have a hard time keeping the front 2 cylinders cool. Time will tell and theres ample room for diverters or whatever is necesarry to get this beast cooled down.
|
|
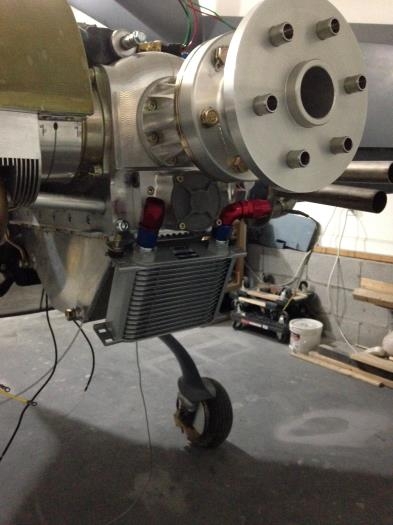
cooler location
|
|
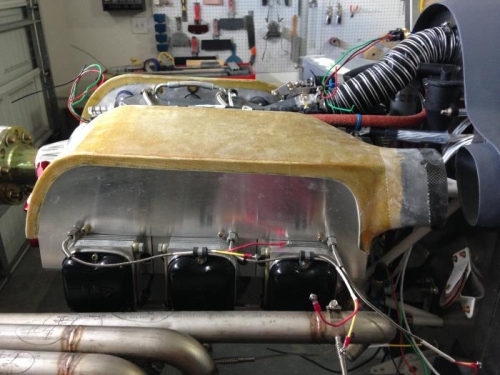
right plenum cleaned up
|
|
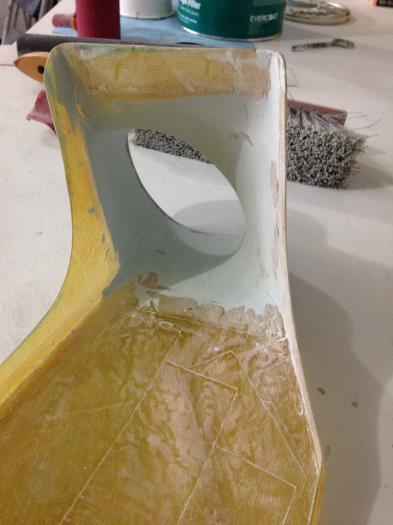
filler inside inlet
|
|
|
|
|
|
|
|
|
Copyright © 2001-2024 Matronics. All Rights Reserved.
|