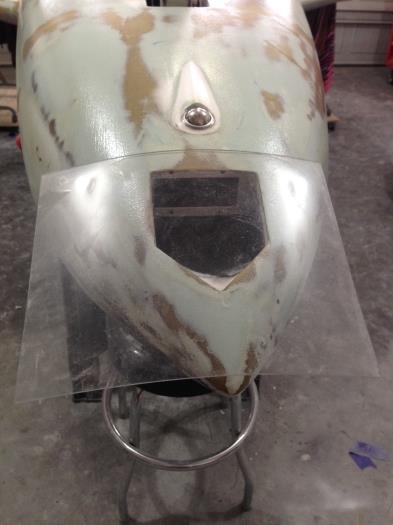
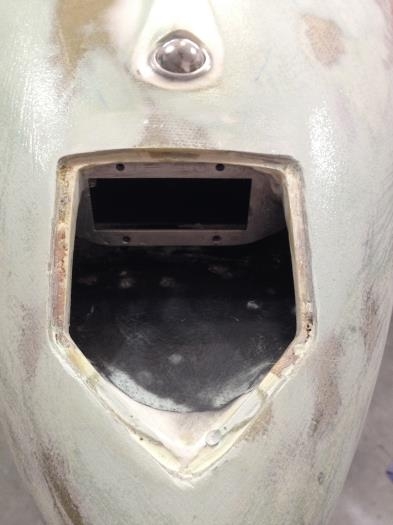
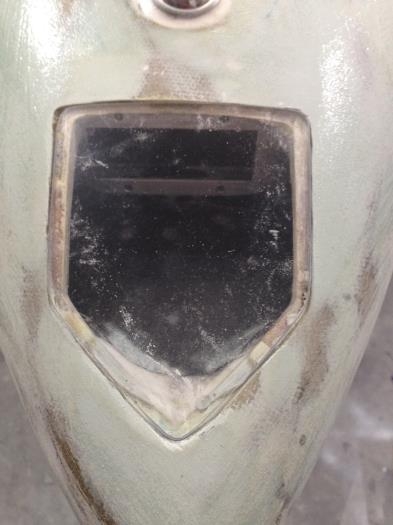
Step one here is to take a piece of .090 lexan and bake it in the oven for 30 minutes at 290 degrees. This makes it nice and soft without distorting the optical clarity. Then lay it over the part of the nose where it goes and push down on the lexan to shape it over the void. I got it almost perfect on the first try. The second time I heat it will be after it's installed. This will relieve the rest of the stresses and help it finalize the shape. I'll be using a heat gun. Next I router out a channel .090 deep and about 1/8" wide to accommidate the lexan. I did a real hack job at this, but that's why God made body filler and micro :0 I then traced the lexan around the recessed area, cut it out and drilled 5 holes in the lexan at each corner. The holes will be for #6 flush screws. I then countersunk the holes and installed nut plates in each hole. The lexan was then pressed into the recess with 5 minute flox at each nutplate and allowed to cure. This flox sucks bad. It's horrible. super weak. I then removed the screws and lexan and mashed some "real" flox around the voids and over the nutplates. Another hack job. messy. After this cures I'll sand for a good fit, then add filler for a nice smooth nose to lexan transition. It's messy now, but It's gonna like awesome when I'm done. Stay tuned...