Two days ago I cleaned up the support area and made two ply 2" tapes for both sides of the outer seat supports. Oh yes and peel plyed them too at the transitions. I did a single ply 2" tape (six of them) for the front storage box too. It took nearly all day! Yesterday I went flying instead of working on the build, just for a change.
Today began with cleaning up the outer seat support tapes and then quite some time getting the support tops level. I used permagrit curved files and then the long sanding block you see in pic 1. The 12" ruler worked well too in getting levels from the center two supports to either edge. I made the rear part of the set supports blend a lot better with the seat itself for a smooth transition.
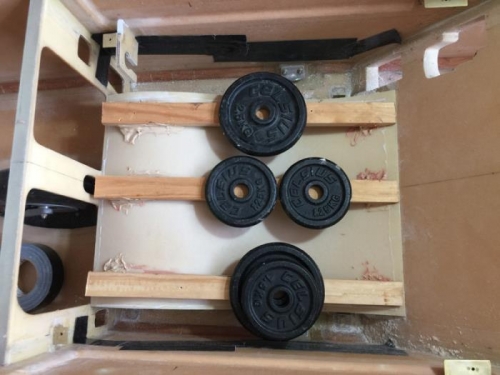
Pic 2 shows that I've put some timber supports and then weights down to get the seat to flex into position and as flat as possible against the supports. With this done I then added a lot of 'bondo' so securing the shape. Once it was set I had the contour I wanted and lifted this off and hot glued it to my work bench inverted so the bare foam was face up.
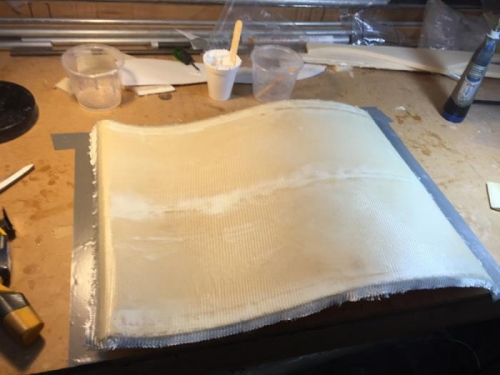
Pic 3 shows two ply of BID down after filling the dings with micro and making a flox corner fore and aft. Once cured and removed from the supports I should have a close fitting seat top.
I'm still deciding if I'll hinge it or just have 4 fasteners. The area below the seat might fit a fire extingisher, maybe an O2 bottle on the other side and tools in the middle. I'm yet to find out what diameters will fit. That said, its a lot of work for extra storage in this very small plane.