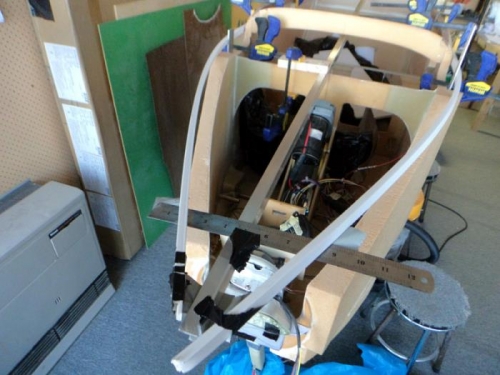
Using a delay in the canard build I'm back on the nose. The challenge was to make a curve that leads into the minimum area that I must leave so that the head light can fully deploy left right up down. I made a card with these maximum L/R deflections and attached it to the light which is just visible in pic one.
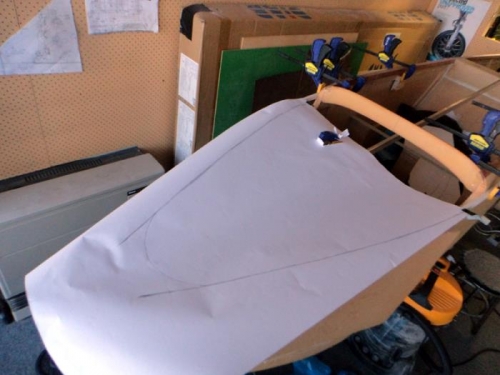
Some plastic conduct clamped to the sides was then taped to rulers and a straight edge down the centerline of the fuselage. So now I had a nice even curve ending up with its sides giving clearance at the headlight movement card. A ruler taped in place also helped. With this arrangement I just layed out a big piece of paper and drew lines as marked from the conduit. I used the edge of a pencil on the corners which were underneath the paper. Easy.
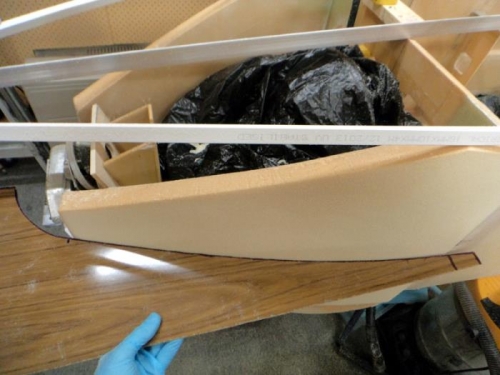
Next up came a template out of some laminex as in pic three. A couple of hours or so was next with careful shaping of both sides using a disc sander at very low speed. The curve I want is in a precise place and this will become the widest part of the nose curve with the rest of the shape falling away from these points.
Took a bit of thought. I want a shortish nose and it seems the shape is going to design itself from necessity. Its about an inch shorter than plans so far but wider more like a basketball shape rather than a pine cone. I wonder what it's going to look like finished??