
|

|
|
|
Zenith CruZer & Sonex Logs
|
Date: 4-3-2018
|
Number of Hours: 1.30
|
Manual Reference: C75-WA-3
|
Brief Description: Finish Strut Fitting / Cut L-angles
|
|
Well, it's been a few days... Had the problem late Friday; Saturday didn't do too much; Sunday was Easter (and my b'day family party). Monday I installed a new floor in our recently renovated patio room, so today was the first chance to do some airplane stuff.
Got the answer from Roger at Zenith today; it's OK to cut a notch into the strut fitting angle (and round the corners). Basically cut it on the Scotch-Brite wheel!
Cleco'd into place and fit the angle doubler. Had to cut about 1.5mm from the bottom flange of it to provide a snug fit to the strut fitting itself. Drilled thru the doubler with #40 (existing pilot holes), then up-dtrilled to #30, and finally to #20. Riveted with A5 rivets. Test fit was pretty good. Had to trim the doubler a bit around the curved part of the thick strut fitting in order for trhe strut itself to fit well enough for the 3/8" bolt to go thru. Since clearances are tight, while I had the stut end in place, I marked the spot for the A5 rivet that will be installed just below the 3/8" hole.
Next, I cut all of the L-angles that will be installed on the upper skin. All are the same length as those on the bottom skin with the exception of the outboard bay since the wing is at an angle at that location.
Next up: remove the bottom skins; debur the ribs, spar, and skins. Turn wing skeleton over so topside is up. Position the upper skins. Position, drill, cleco, and rivet the upper L-angles. Turn wing over and rivet bottom skins, then back over to work on the topside skins again.
|
|

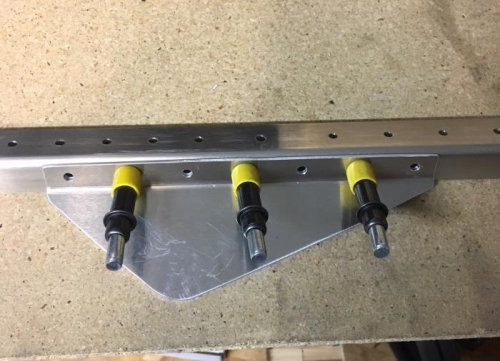
Notch placed in Strut Fitting Angle
|
|
Fitting Angle Doubler updrilled to #20
|
|
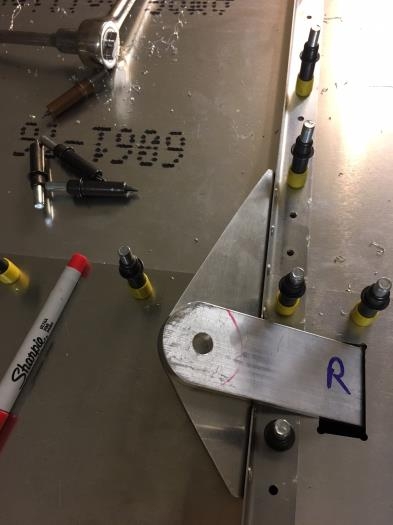
Test fit in place
|
|
|
|
|
|
|
|
|
Copyright © 2001-2024 Matronics. All Rights Reserved.
|