Brief Description: Fabricate Stiffeners and Drill Counterbalance
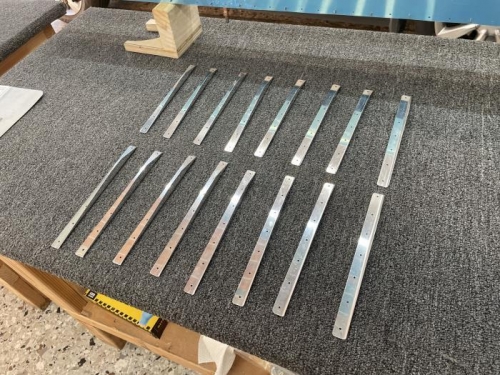
I decided to fabricate the stiffeners ahead of time because I was dreading having to drill through the steel counterbalance again. It was a nice change of pace. My band saw broke its fine tooth blade so I've been using my high speed cutoff wheel instead. Frankly it's easier to use than the band saw and I can stack the angles up when cutting to finish the job much faster. I decided to do just the ones I needed for the left aileron only.
Marked them up for cutting and used my left and right snipes to remove the majority of material. I'm finally proficient with the snipes, but it took a while of mediocre results before I had that a-ha! moment on the correct usage. Finished the profiling on the belt sander and deburred on the 3M wheel.
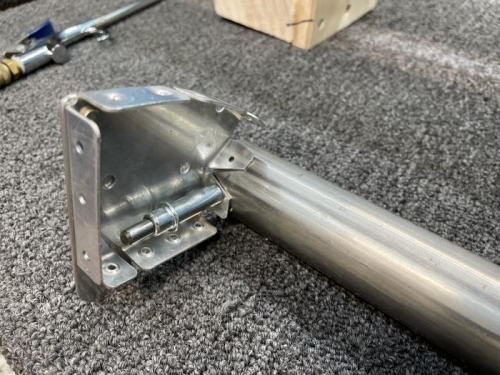
So back to the counterbalance to match drill the lower rib hole with it. The plans call for an extended length drill bit but I only had a 12 in. #40 which was a bit wobbly. I would have preferred a six in., but I made do here. Eventually these holes c/t the rib and counterbalance get final sized to a #27 for screws while the nose skin to counterbalance get a #30 for LP4-3 pop rivets. I managed to match drill the lower holes, but stopped there because the upper holes will really benefit from a six inch long bit. I don't even have a #27 extended length bit, so I ordered a couple of each size from McMaster-Carr.
Pulled the rib/tube assembly out from the skin and I immediately see a problem doing the next step. More to come.
All of the skin stiffeners completed for later
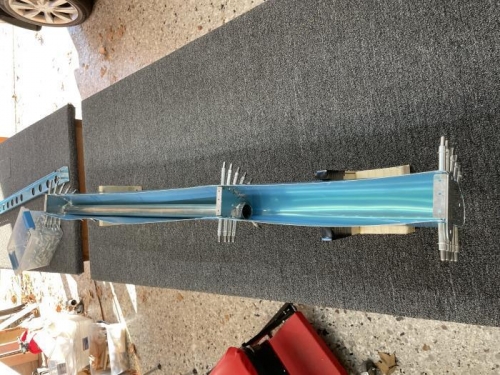
Nose to counterbalance drilled. Spar removed to match drill rib to tube.
Lower rib hole drilled. Next step is to mark with a drill the upper hole then finish on drill press.