Date
|
Hours
|
Work Log Summary

|
Details

|
07-23-2021
|
8.00
|
Installed the overhead console
|
|

  |
|
04-08-2017
|
3.00
|
DAR inspection for Airworthiness Cert - Passed!
|
|
   |
|
04-07-2017
|
6.00
|
Final prep for inspection
|
|
   |
|
04-06-2017
|
4.00
|
Certifications and fix brake lines
|
Details
|


 |
|
04-05-2017
|
4.00
|
Replaced Right fuel tank
|
|
   |
|
04-04-2017
|
2.00
|
Repaired small fuel leak
|
|
   |
|
04-03-2017
|
4.00
|
Pulled fight fuel tank to repair a small leak
|
|
   |
|
03-28-2017
|
6.00
|
Prep and paperwork for inspection
|
|
   |
|
03-27-2017
|
8.00
|
First engine start. Installed fire extinguisher
|
|
   |
|
03-24-2017
|
7.00
|
Tourqued propellor. Installed spinner and seat.
|
Details
|

  |
|
03-23-2017
|
7.00
|
make a tool for tourquing prop. Put oil in engine.
|
|
   |
|
03-22-2017
|
8.00
|
Sand and buff, sand and buff, sand and buff
|
|
   |
|
03-21-2017
|
8.00
|
Preped and clear coated wheel coverings
|
|
   |
|
03-20-2017
|
8.00
|
Painted the white base coat on the wheel pants
|
|
   |
|
03-17-2017
|
2.00
|
Put on first light coat of primer
|
|
   |
|
03-14-2017
|
8.00
|
Glased pinholes and sanded wheel pants and legs
|
|
   |
|
03-13-2017
|
2.50
|
Buffing vert stabilizer and upper and lower cowl
|
|
   |
|
03-10-2017
|
6.00
|
Preped and clearcoated lower cowl, and rudder
|
|
   |
|
03-09-2017
|
8.00
|
Paint cowlings, and vertical stabilator
|
|


 |
|
03-08-2017
|
9.00
|
Two more coats of primer. Sand. Fill pin holes, ..
|
|
   |
|
03-07-2017
|
10.00
|
Prepping and finally etch coat and ptimer coats
|
|
   |
|
03-06-2017
|
8.00
|
Buffing canopy and vert stab. Install canopy
|
|

  |
|
03-03-2017
|
6.00
|
clear coated. Got some runs. Will have to sand a
|
|
   |
|
03-02-2017
|
2.00
|
Painted base coat Blue on Cnopy, rudder, Vert Stat
|
|


 |
|
03-01-2017
|
8.50
|
Paint prep, etching primer, grey primer
|
|


 |
|
02-28-2017
|
8.00
|
Prepping for paint
|
|


 |
|
02-27-2017
|
9.00
|
Installed seat belts. Interior cover panels.
|
|
   |
|
02-26-2017
|
3.50
|
Completed the Left main fairing
|
|

  |
|
02-25-2017
|
2.00
|
Finished R. Main gear fairings. Started on left.
|
|

  |
|
02-24-2017
|
7.00
|
Worked on right gear fairings
|
|
   |
|
02-23-2017
|
4.50
|
Finished up the empenage fairing. Applied N number
|
|


 |
|
02-22-2017
|
7.50
|
Empenage fairing ready to screw on
|
|

  |
|
02-21-2017
|
5.00
|
Finished nutplating the main gear wheel pants
|
|
   |
|
02-20-2017
|
9.00
|
Made both main gear leg fairings
|
|


 |
|
02-17-2017
|
9.00
|
Installed nose gear strut fairing and bottom cowl
|
|

  |
|
02-16-2017
|
3.00
|
Install nutplates on nose gear faring.
|
|
   |
|
02-15-2017
|
9.50
|
Nose gear fairing. Trim, fit, and align
|
|

  |
|
02-14-2017
|
6.50
|
Left main gear and nose gear wheel pants
|
Details
|


 |
|
02-13-2017
|
5.50
|
Working on Left main gear wheel pants
|
|
   |
|
02-11-2017
|
2.00
|
Continue fitting the Right wheel pant
|
|

  |
|
02-10-2017
|
5.00
|
Started on the R Main wheelpants
|
|
   |
|
02-09-2017
|
5.00
|
Finished new rudder
|
|

  |
|
02-02-2017
|
3.00
|
Worked on bottom fairing for the rudder
|
|
   |
|
02-01-2017
|
4.00
|
Continue constructing new rudder
|
|
   |
|
01-31-2017
|
6.00
|
Canopy hinge tabs, elevator trim tab, rudder
|
Details
|


 |
|
01-30-2017
|
6.00
|
Elivator trim tab and airplane mover
|
Details
|


 |
|
01-27-2017
|
6.00
|
Various
|
Details
|


 |
|
01-26-2017
|
6.00
|
Trouble shooting and upgrading connectors.
|
Details
|
   |
|
01-25-2017
|
9.00
|
Making new rudder
|
|

  |
|
01-24-2017
|
5.00
|
Inventoried and started the new rudder
|
|

  |
|
01-23-2017
|
6.00
|
Glare shield, balance elevator, fairing
|
Details
|


|
|
01-20-2017
|
5.00
|
Installed glare shield cover and AOA indicator
|
|


 |
|
01-19-2017
|
3.00
|
Installed the canopy defog fans
|
|
   |
|
01-19-2017
|
3.00
|
Big Mistake today
|
Details
|

  |
|
01-18-2017
|
2.00
|
Take care of punch list from Mondays inspection
|
|
   |
|
01-18-2017
|
4.50
|
Finished installing the two cowl baffles
|
|
   |
|
01-17-2017
|
9.50
|
Spent all day on the led lights and a dimmer
|
|
   |
|
01-16-2017
|
3.00
|
Pre inspection by Phil Vitatoe
|
|
   |
|
01-16-2017
|
3.00
|
Continue wireing canopy lights and micropswitch
|
|

  |
|
01-13-2017
|
7.00
|
Canopy alignment pins. Closed microswitch.
|
|


|
|
01-12-2017
|
8.00
|
/finiahing and adjusting canopy. Reweighed plane.
|
|

  |
|
01-11-2017
|
1.50
|
flox fiberglassing the lower cowl for baffling
|
|
   |
|
01-11-2017
|
4.00
|
Canopy - sanding, filling, sanding, resin coat
|
|
   |
|
01-10-2017
|
9.00
|
Shaping sanding of canopy
|
|

  |
|
01-09-2017
|
8.00
|
Fiberglass layup on the canopy
|
|

  |
|
01-06-2017
|
6.50
|
various
|
Details
|
   |
|
01-05-2017
|
6.00
|
Multiple items
|
Details
|
   |
|
01-04-2017
|
7.00
|
Continue canopy work
|
|

  |
|
01-03-2017
|
3.00
|
Weight and Balance. Within range
|
|
   |
|
01-03-2017
|
4.00
|
Continue wowrking on the Canopy.
|
|
   |
|
01-02-2017
|
8.00
|
Canopy - attach side rails and canopy to frame
|
|
   |
|
12-30-2016
|
1.00
|
Timed the emags
|
|
   |
|
12-30-2016
|
6.00
|
Drilled and countersunk the canopy. sand cowl.
|
|
   |
|
12-29-2016
|
3.50
|
more cowlingwork and run spark plug wires
|
|
   |
|
12-29-2016
|
3.00
|
Adjusting canopy so it lowers and latches smoothly
|
|
   |
|
12-27-2016
|
8.50
|
Fitted and initial drilled the canopy
|
|

  |
|
12-26-2016
|
6.50
|
Fitting canopy
|
|

  |
|
12-16-2016
|
2.50
|
Clean up. Fill and sand on the cowling exhaust
|
|
   |
|
12-15-2016
|
4.00
|
Installed the rear canopy
|
|

  |
|
12-14-2016
|
4.00
|
dimpled and countersunk for rear window
|
|
   |
|
12-13-2016
|
3.00
|
tapped the 6-32 holes in window and fitted front e
|
|

  |
|
12-12-2016
|
6.00
|
Fitted and drilled holes for bagage window
|
|
   |
|
12-09-2016
|
6.00
|
Work on baffling and install crank case breather
|
|
   |
|
12-09-2016
|
2.00
|
Install Horizontal stabalitor and elivator
|
|
   |
|
12-09-2016
|
2.00
|
Calibrate trims and set v speesd
|
|
   |
|
12-05-2016
|
4.00
|
Aligning the bagage compartment plexiglass
|
|
   |
|
12-05-2016
|
4.00
|
Adjusting the cowlings fitting
|
|
   |
|
12-02-2016
|
8.00
|
Install EGT and CHT probs and wireing
|
|


 |
|
12-01-2016
|
6.50
|
Body filler added and sanded for exhaust exit.
|
|

  |
|
11-30-2016
|
5.50
|
Installed two thirds of the baffel seals
|
|

  |
|
11-30-2016
|
2.50
|
Constructed a bracket to hold GPS antennas
|
|

  |
|
11-29-2016
|
5.00
|
Get pressure sensors and alert audio working
|
|
   |
|
11-29-2016
|
4.00
|
Continue working on cowl exhaust and intakes.
|
|
   |
|
11-28-2016
|
4.00
|
Install a shunt for primary amperage
|
|
   |
|
11-22-2016
|
8.00
|
Fiberglass plus electrical.
|
Details
|
   |
|
11-21-2016
|
4.00
|
Adjusting Pmags and installing manifoild pressure
|
|
   |
|
11-18-2016
|
6.00
|
fiberglassing exhaust fairings. Epoxying air ducts
|
|
   |
|
11-17-2016
|
6.00
|
Cowling door, exhaust farings, cowl inlet farings
|
|


|
|
11-16-2016
|
8.00
|
Man Pres Sensor, Oil press sensor, oil door
|
|
   |
|
11-15-2016
|
6.00
|
Install sniffle valve, fuel relief, & Manifold pre
|
|


|
|
11-14-2016
|
1.50
|
Inspection by Bill Abel, EAA Technical Counselor
|
|
   |
|
11-14-2016
|
7.00
|
Finished installing oil cooler. Adel clamping line
|
|

  |
|
11-11-2016
|
8.00
|
Oil cooler and making fiberglass exhaust cowls
|
|
   |
|
11-10-2016
|
2.00
|
Final adjust and fit the engine cowls
|
|
   |
|
11-10-2016
|
1.00
|
Calibrate G3x Magnatometer
|
|
   |
|
11-09-2016
|
1.00
|
Installed theair intake baffleing
|
|

  |
|
11-09-2016
|
2.50
|
Aligned the Mini X Magnatometeer
|
|

  |
|
11-08-2016
|
7.00
|
Installed heating scat tube ducting
|
|

  |
|
11-07-2016
|
4.40
|
Fabricated and installed 4 tension rods on bafflin
|
|
   |
|
11-04-2016
|
9.00
|
connecting fuel lines and cooling tubes
|
|


|
|
11-03-2016
|
8.00
|
Finish and install Alt Air Door in air intake plen
|
|

  |
|
11-02-2016
|
6.00
|
Design and make alternate air door
|
|

  |
|
11-01-2016
|
8.00
|
Installed air filter
|
|


 |
|
10-27-2016
|
4.00
|
Made attachment for air filter
|
|
   |
|
10-26-2016
|
7.50
|
Continuing baffle instalation
|
|
   |
|
10-25-2016
|
9.00
|
Finish installing exhaust.
|
|


 |
|
10-24-2016
|
9.00
|
Air duct fiberglassing andtrimming cowling for exh
|
|
   |
|
10-21-2016
|
7.00
|
More fiberglassing on intake baffle plus paint baf
|
|
   |
|
10-20-2016
|
7.00
|
Finish making baffles and undercoated
|
|

  |
|
10-19-2016
|
9.00
|
Woking on modifying the air intaker
|
|
   |
|
10-18-2016
|
3.00
|
More fiberglassing on the air induction
|
|
   |
|
10-17-2016
|
9.50
|
Fiberglass engine air duct. Assembling engine baff
|
|


 |
|
10-14-2016
|
5.50
|
Worked on filtered air to the engine
|
|
   |
|
10-12-2016
|
8.00
|
Finished and painted Left Forward baffel
|
|

  |
|
10-11-2016
|
4.50
|
Finishing Left front baffle
|
|

  |
|
10-10-2016
|
8.00
|
Making new Left front baffle
|
|
   |
|
10-07-2016
|
7.00
|
Finished clecoing the cowl.
|
|


|
|
10-06-2016
|
6.00
|
Working on the cowl
|
|

  |
|
10-05-2016
|
6.00
|
Fitted and cleco'd on the top cowl. Started on bot
|
|

  |
|
10-04-2016
|
8.50
|
Installed MT prop. Continue working on cowling
|
|
   |
|
10-03-2016
|
4.50
|
Working on the air intake filter housing
|
|
   |
|
09-30-2016
|
5.00
|
Cutting cowls
|
|


 |
|
09-29-2016
|
2.00
|
Finishing the Fuselage to cowl hinges
|
|
   |
|
09-28-2016
|
5.00
|
L front cowling. Alternator bracket. Start cowl hi
|
|
   |
|
09-27-2016
|
2.00
|
Moved prop to hangar and unpackaged.
|
|

  |
|
09-27-2016
|
2.00
|
Continue work on baffling
|
|


 |
|
09-22-2016
|
4.00
|
Working on baffling and air filter location
|
|
   |
|
09-21-2016
|
8.00
|
Work on modifying baffling
|
|
   |
|
09-20-2016
|
7.00
|
Install seats and work on grouping wiring
|
|
   |
|
09-19-2016
|
6.00
|
Finished wiring cowl flap. Clean up wireing.
|
|

  |
|
09-16-2016
|
7.00
|
Wired up the cowl flap
|
|
   |
|
09-15-2016
|
4.00
|
Worked on sorting out fluid fittings
|
|
   |
|
09-13-2016
|
4.00
|
Tach wireing and seat wireing
|
|
   |
|
09-13-2016
|
5.00
|
Seat heaters switch and install seat floors
|
|
   |
|
09-12-2016
|
4.00
|
Wired up the new starter contactor and USB ports
|
|
   |
|
09-09-2016
|
4.00
|
install cowl flap - mechanically
|
|


 |
|
09-09-2016
|
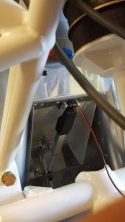
5.00
|
Design and make electric cowl flap
|
|

 |
|
09-08-2016
|
3.00
|
Installed B+ wire from Alt 1. Started cowl flap
|
|
   |
|
09-07-2016
|
8.00
|
Put a new hole in firewall. Connected control cabl
|
|
   |
|
09-06-2016
|
7.00
|
Installed PMag and Alt ckt Bkr Switches
|
|
   |
|
09-01-2016
|
6.00
|
Wired up the AOA. Most time wiring the Audio Aler
|
|
   |
|
08-31-2016
|
7.00
|
Wired part of AOA. Sired seat heaters.
|
|
   |
|
08-30-2016
|
5.00
|
Installer exhaust. Rewire wingtip light plugs
|
|
   |
|
08-29-2016
|
6.50
|
Created the bracket to hold the mixture cable
|
|

  |
|
08-26-2016
|
2.30
|
Continue designing & installing throttle bracket
|
|


 |
|
08-25-2016
|
8.00
|
Designing a throttle bracket for the engine
|
|
   |
|
08-24-2016
|
4.00
|
Evaluated alternatives to how best to add final ci
|
|
   |
|
08-23-2016
|
10.00
|
Wiring up the #2 Alt and pulling other wires
|
|
   |
|
08-22-2016
|
6.00
|
Putting in adel clamp
|
|
   |
|
08-19-2016
|
1.00
|
Installed foot steps
|
|

  |
|
08-16-2016
|
4.00
|
Finished adjusting and installing deice brush bloc
|
|

  |
|
08-09-2016
|
8.00
|
Designing abracket to hold the Brush Block
|
|

  |
|
08-08-2016
|
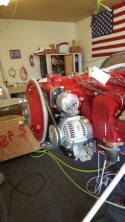
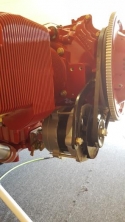
10.00
|
Completed alternator install. Cabin heat vents.
|
|
 |
|
08-05-2016
|
6.50
|
Manufacture and install the ships alternator brack
|
|
   |
|
08-03-2016
|
10.00
|
Hooked up deice controllers
|
|
   |
|
08-02-2016
|
8.00
|
Ran and hooked the deice grounds
|
|
   |
|
07-29-2016
|
8.00
|
Install left wing faring and left wing inboard dei
|
|
   |
|
07-21-2016
|
3.00
|
Worked on leaking left brake line
|
|
   |
|
07-21-2016
|
2.00
|
Defined heater power locations.
|
|
   |
|
07-20-2016
|
8.00
|
Start fitting and installing wing root fairings
|
|
   |
|
07-19-2016
|
8.00
|
Charge brakes with fluid. Adjust flaps.
|
|
   |
|
07-18-2016
|
4.00
|
Conncect and program flaps
|
|

  |
|
07-14-2016
|
4.00
|
Connect and align ailerons
|
|
   |
|
07-13-2016
|
4.00
|
Routed and connected the wing power wires
|
|
   |
|
07-12-2016
|
2.00
|
Continue connecting deice wires
|
|
   |
|
07-11-2016
|
5.00
|
Install deice alternator
|
|
   |
|
07-08-2016
|
8.00
|
Mounted Engine
|
|


 |
|
07-07-2016
|
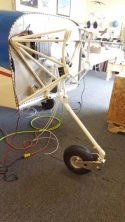
6.00
|
Installed nose gear and balanced and installed whe
|
|
  |
|
07-06-2016
|
4.00
|
Mounted engine bracket and started nose wheel
|
|

  |
|
06-28-2016
|
7.00
|
Installed battery and contactors
|
|

  |
|
06-26-2016
|
2.50
|
Tracking down a servo fault
|
|
   |
|
06-24-2016
|
7.00
|
Hook up pitot heat and wing lights
|
|
   |
|
06-23-2016
|
4.50
|
Continue wing lights wiring
|
|
   |
|
06-22-2016
|
4.00
|
Finished AHRS wiring and started Wing lights
|
|
   |
|
06-20-2016
|
10.00
|
Installing wiring in right wing
|
|
   |
|
06-20-2016
|
10.00
|
configured avionics. found fault in trim system.
|
|
   |
|
06-16-2016
|
5.00
|
Pulling wires through the wings.
|
|
   |
|
06-14-2016
|
5.00
|
Installed pitot.Pulled wire.
|
|
   |
|
06-13-2016
|
2.00
|
install alternate static source.
|
|
   |
|
06-10-2016
|
6.00
|
Modified the start switch to work with EMags
|
|
   |
|
06-08-2016
|
2.00
|
Installed Deice LED's and worked on key switch
|
|
   |
|
06-07-2016
|
2.00
|
Pulled Mini X Magnetometer wires
|
|
   |
|
06-06-2016
|
7.00
|
Installed wings with the help of Wayne, Stan, & Sc
|
|


 |
|
06-01-2016
|
4.00
|
Installed both comm antennas
|
|
   |
|
05-20-2016
|
3.00
|
Installed parking brake bracket and valve
|
|

  |
|
05-19-2016
|
2.00
|
Constructed bracket for parking brake
|
|
   |
|
05-18-2016
|
7.00
|
Installed the deice electronics and hooked up tail
|
|


 |
|
05-17-2016
|
8.00
|
Constructed shelf and installed tail deice control
|
|
   |
|
05-13-2016
|
8.50
|
Continue pulling wires for Deice system
|
|
   |
|
05-12-2016
|
6.50
|
Started wiring up the deice electrics
|
|

  |
|
05-10-2016
|
6.50
|
Main gear installedd and rotator dismantled
|
|

  |
|
05-09-2016
|
4.00
|
Pack wheel bearings, mount and Balance tires
|
|
   |
|
05-06-2016
|
6.50
|
Align gear legs for toe in/ toe out
|
|
   |
|
05-05-2016
|
3.00
|
Adjusting and fitting to get right main gear on
|
|
   |
|
05-04-2016
|
7.00
|
Started installing the main gear
|
|

  |
|
05-03-2016
|
8.50
|
Got the Pilots stick buttons connected.Pitch trim
|
|
   |
|
05-02-2016
|
11.00
|
Control stick wiring. Talking with Prop shops.
|
|
   |
|
04-29-2016
|
7.00
|
Hook up headsets and audio panel
|
|
   |
|
04-28-2016
|
3.50
|
Started wiring up the headset jacks
|
|
   |
|
04-27-2016
|
6.00
|
Wired up the Mini X EFIS
|
|
   |
|
04-26-2016
|
10.00
|
Installed magnetomer and AHRS.
|
|
   |
|
04-25-2016
|
7.00
|
Continued building a "Rats Nest" of wires
|
|

  |
|
04-22-2016
|
8.00
|
Wire the pitch servo and the autopilot head
|
|
   |
|
04-21-2016
|
8.00
|
Flaps and VPX
|
Details
|
   |
|
04-20-2016
|
8.00
|
Wrapped panels. Set switches to rotate. Labeled.
|
|

  |
|
04-19-2016
|
7.00
|
Wrap L. panel. install dp3t switches
|
|
   |
|
04-18-2016
|
4.00
|
Antenna connectors and installed 530W backkplate
|
|
   |
|
04-15-2016
|
2.00
|
Wiring 530w Com and Nav
|
|
   |
|
04-14-2016
|
7.00
|
Wiring vp switches and GNS530W
|
|
   |
|
04-13-2016
|
4.00
|
Getting parts and continued wiring 530W
|
|
   |
|
04-12-2016
|
6.00
|
Worked on laying out panel. and wrapped center par
|
|

  |
|
04-11-2016
|
8.00
|
Finished antenna wire make and pull.
|
|
   |
|
04-07-2016
|
8.00
|
Wired ther xponder. Started gthe ADSB unit.
|
|
   |
|
04-05-2016
|
8.00
|
Compo;eted cutting out panel
|
|

  |
|
04-04-2016
|
5.50
|
Set up cable runs in the wings. Work on panel cuts
|
|
   |
|
04-01-2016
|
6.00
|
Continue wiring antennas
|
|
   |
|
03-31-2016
|
7.00
|
Worked on installing antennas
|
|
   |
|
03-30-2016
|
6.00
|
Installed two antenna's. Xponder and ADSB
|
|

  |
|
03-29-2016
|
6.00
|
Continue wiring
|
|
   |
|
03-28-2016
|
8.00
|
Cut out center panel and continued wireing
|
|

  |
|
03-24-2016
|
3.00
|
Wiring GAD29 to GNS530W
|
|
   |
|
03-23-2016
|
7.00
|
Wiring and insulating
|
Details
|

  |
|
03-22-2016
|
4.00
|
Started making wiring harness for #2 comm
|
|
   |
|
03-16-2016
|
7.00
|
Finish installing VOR Ant in right wing tip.
|
Details
|


 |
|
03-15-2016
|
3.00
|
Wireing wing tip lights.Start install VOR antenna
|
|
   |
|
03-14-2016
|
4.00
|
Windshield deice and vor ant
|
Details
|
   |
|
03-11-2016
|
6.00
|
Talked to RDD and devised a deice component layout
|
|
   |
|
03-10-2016
|
6.00
|
Install windshield deice tank
|
|


 |
|
03-09-2016
|
9.50
|
Installed canopy latch including a key lock
|
|


 |
|
03-08-2016
|
9.00
|
Avionics stuff
|
Details
|
   |
|
03-07-2016
|
3.00
|
Worked on laying out deice electronics
|
|

  |
|
03-05-2016
|
3.00
|
Working on panel to hold deice boxes
|
|
   |
|
03-04-2016
|
10.00
|
Continue designing and building avionics trays.
|
|

  |
|
03-03-2016
|
7.00
|
Continue designing brackets to hold remote avionic
|
|

  |
|
03-02-2016
|
6.00
|
Installed a rain gutter
|
Details
|

  |
|
03-01-2016
|
8.00
|
Emergency release pins
|
Details
|

  |
|
02-29-2016
|
9.50
|
Worked on the install box for 530w and audio pnl
|
|
   |
|
02-26-2016
|
9.00
|
Assembled and riveted canopy
|
|
   |
|
02-25-2016
|
4.50
|
Disasemble canopy frame, prep, assemble for riveti
|
|
   |
|
02-24-2016
|
2.00
|
Rear canopy handle
|
|
   |
|
02-24-2016
|
6.00
|
Completed canopy side rails. Not riveted yet.
|
|

  |
|
02-23-2016
|
6.00
|
Installed aileron trim
|
|
   |
|
02-23-2016
|
2.00
|
Canopy side rails
|
|
   |
|
02-22-2016
|
2.00
|
Construct a wind deflector for the spray bar
|
|
   |
|
02-18-2016
|
4.00
|
Install winshild deice spray bar
|
|
   |
|
02-17-2016
|
6.00
|
Test run the engine on the test truck
|
|


 |
|
02-16-2016
|
4.00
|
Install engine on test truck
|
|

  |
|
02-16-2016
|
5.00
|
Finish engine build
|
|


|
|
02-15-2016
|
10.00
|
Engine Build School
|
|


|
|
02-12-2016
|
2.00
|
Installed a flap position sensor
|
|

  |
|
02-11-2016
|
2.50
|
Working on layout of all the avionics remote boxes
|
|
   |
|
02-10-2016
|
7.00
|
Assembly of the canopy forward structure
|
|

  |
|
02-09-2016
|
6.00
|
Figured out locations for avionics boxes
|
|
   |
|
02-09-2016
|
2.00
|
Begin building the canopoy frame
|
|
   |
|
02-08-2016
|
3.00
|
Work on locations for all the boxes
|
|
   |
|
02-08-2016
|
5.00
|
Cleanup
|
|
   |
|
02-06-2016
|
4.00
|
Clearcoated the fuselage
|
|

  |
|
02-05-2016
|
8.00
|
Touch up white and paint red stripe
|
|


|
|
02-04-2016
|
5.00
|
Paint blue then white
|
|


|
|
02-03-2016
|
2.00
|
Sand primer
|
|
   |
|
02-02-2016
|
5.00
|
Sand and paint more primer
|
|
   |
|
02-01-2016
|
4.00
|
Etch primer and gray primer'd the fuselage
|
|

  |
|
01-30-2016
|
2.00
|
masking and cleaning fuselage readying for paint
|
|
   |
|
01-28-2016
|
8.00
|
Inventory finish kit and start masking for paint
|
|
   |
|
01-27-2016
|
8.00
|
Finished roll bar. Started inventorying finish kit
|
|


 |
|
01-26-2016
|
8.00
|
Make and begin install of roll bar
|
|

  |
|
01-25-2016
|
6.00
|
Install and adjust stick controls. Install elevato
|
Details
|


 |
|
01-22-2016
|
7.00
|
Elivator actuator tubes, control sticks, sealent
|
|


|
|
01-21-2016
|
8.00
|
Finished riveting top forwars skin. Starrted contr
|
|

  |
|
01-20-2016
|
6.00
|
Readying and begin riveting the forward top skin o
|
|
   |
|
01-19-2016
|
3.00
|
Cleko attached top front hinge
|
|
   |
|
01-18-2016
|
7.00
|
Make and install canopy tilt and release mechanism
|
|
   |
|
01-15-2016
|
6.00
|
Made the canopy releas mechanism
|
|

  |
|
01-08-2016
|
5.00
|
Installed side rails and prepared dash structure
|
|
   |
|
01-07-2016
|
7.00
|
Finished bagage walls and panel structure
|
|

  |
|
01-06-2016
|
4.00
|
Working on the subpanel
|
|
   |
|
01-05-2016
|
7.00
|
Finishing up Flaps, baggage, and windshield deice
|
|


 |
|
01-04-2016
|
9.00
|
Worked on Rudder, Baggage floor, and Flaps
|
|
   |
|
12-31-2015
|
7.50
|
Install brakes, brake lines, and start rudder cabl
|
|


 |
|
12-30-2015
|
4.50
|
Begin riveting in the baggage compartment flooring
|
|

  |
|
12-23-2015
|
6.00
|
Finish and install rudder pedals. Begin installing
|
|

  |
|
12-22-2015
|
3.50
|
constructing rudder pedals
|
|

  |
|
12-21-2015
|
6.00
|
Prep all the parts for the baggage floor
|
|

  |
|
12-18-2015
|
5.00
|
Finished riveting sec 29. Finished fuel lines sec
|
|


|
|
12-17-2015
|
6.00
|
Started installing the fuel transfer system
|
|


 |
|
12-16-2015
|
3.00
|
Continue riveting fuselage halfs together
|
|
   |
|
12-15-2015
|
2.50
|
Begin riveting
|
|
   |
|
12-14-2015
|
5.00
|
Install bulkheads with cleko's
|
|
   |
|
12-10-2015
|
4.00
|
Redid the air vents for aluminum vents.
|
|


 |
|
12-09-2015
|
9.00
|
Finished R skin to firewall. mated front to back
|
|


 |
|
12-08-2015
|
4.00
|
Fresh air vents and side ribs back of baggage area
|
|
   |
|
12-07-2015
|
3.00
|
Replaced part F14133 with F14133-1
|
|
   |
|
12-04-2015
|
5.00
|
Install the seat back support
|
|

  |
|
12-03-2015
|
3.00
|
Start assembling seat back guides
|
|
   |
|
12-02-2015
|
6.00
|
Riveting back half of the R fuselage skin
|
|

  |
|
12-01-2015
|
6.00
|
Finish L side skin. Start R. fuselage skin
|
|
   |
|
11-30-2015
|
4.00
|
Finish L side skin plus prepare fairings
|
|
   |
|
11-24-2015
|
6.50
|
Completed left side riveting thru 29-15
|
|


 |
|
11-23-2015
|
8.00
|
Begin riveting on the left side skin
|
|
   |
|
11-19-2015
|
5.50
|
Prepare and install stiffiners on side skins
|
|
   |
|
11-17-2015
|
5.00
|
Dimple side skins. Countersink longerons.
|
|

  |
|
11-16-2015
|
4.00
|
Right side hinge for cowling
|
|
   |
|
11-13-2015
|
4.00
|
create piano hinge cowl connector for L side
|
|

  |
|
11-11-2015
|
8.00
|
Install control column and longerons
|
|

  |
|
11-10-2015
|
7.00
|
Final riveting together of the fwd and mid fuselag
|
|
   |
|
11-09-2015
|
7.00
|
Begin connecting the two forward fuselage halves
|
|


 |
|
11-05-2015
|
3.00
|
battery box installed and finished the lwr fuslg s
|
|

  |
|
11-04-2015
|
4.00
|
Firewall heater vents
|
|
   |
|
11-02-2015
|
8.00
|
Riveted forward bulkhead to firewall structure. Ve
|
|

  |
|
10-30-2015
|
6.00
|
tank seal and rivet firewall assembly to floor ass
|
|
   |
|
10-29-2015
|
6.00
|
sealed and riveted exhaust tunnel and sealed to fl
|
|

  |
|
10-28-2015
|
6.50
|
Completed riveting firewall and started on crew fl
|
|
   |
|
10-27-2015
|
7.00
|
Assembled the firewll and partially riveted
|
|


 |
|
10-26-2015
|
6.00
|
Rivet firewall
|
|

  |
|
10-23-2015
|
7.00
|
Finished riveting ribs to bottom and started tunne
|
|
   |
|
10-22-2015
|
3.00
|
Begin install aftbaggage floor ribs
|
|

  |
|
10-21-2015
|
2.00
|
Continue constructing the baggage floor
|
|
   |
|
10-20-2015
|
3.00
|
Buff and add the blue stripe accent to wing tips
|
|

  |
|
10-16-2015
|
2.00
|
paint red stripe and top coat wing tips
|
|

  |
|
10-15-2015
|
5.00
|
Paint white and tape for red stripe on wing tips
|
|
   |
|
10-14-2015
|
6.00
|
Prime, Sand, reprime both wing tips
|
|

  |
|
10-13-2015
|
4.00
|
Back to working on the fuselage
|
|
   |
|
10-12-2015
|
2.00
|
Finish buffing the R. wing
|
|
   |
|
10-12-2015
|
3.00
|
Catchup
|
Details
|
   |
|
10-08-2015
|
7.00
|
Buffing and polishing right wing
|
|
   |
|
10-05-2015
|
2.50
|
R wing buff and polish
|
|
   |
|
10-02-2015
|
3.50
|
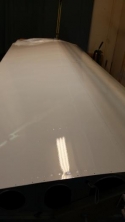
Clear coated the R. wing, aileron and flap
|
|
  |
|
10-01-2015
|
3.00
|
fillking and prepping a dent in the R. aileron
|
|
   |
|
09-30-2015
|
4.00
|
Painted R wing with primer and with base coat.
|
|
   |
|
09-29-2015
|
5.00
|
Prep R wing and spray etching primer
|
|
   |
|
09-28-2015
|
5.00
|
Buffing Left wing
|
|
   |
|
09-25-2015
|
1.00
|
Make pattern for wing tip stripe
|
|
   |
|
09-25-2015
|
3.00
|
continue riveting on mid fuselage
|
|
   |
|
09-24-2015
|
4.00
|
Prep and re clear coat the bottom of the left wing
|
|
   |
|
09-23-2015
|
4.00
|
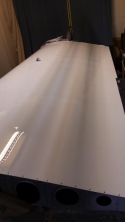
Painted and clear coated top of the left wing
|
|
  |
|
09-22-2015
|
5.00
|
Sand and paint primer on L wing top
|
|
   |
|
09-21-2015
|
4.50
|
Sanding down the wing
|
|
   |
|
09-21-2015
|
1.50
|
Riveting on bottom skin
|
|
   |
|
09-18-2015
|
6.00
|
Tried sanding down and repainting top of L wing
|
Details
|
   |
|
09-17-2015
|
4.50
|
make and Install aft gear brace assembly
|
|

  |
|
09-16-2015
|
6.50
|
Prepare the middle bottom skin
|
|
   |
|
09-14-2015
|
3.00
|
Color and clearcoat left wing
|
|

  |
|
09-11-2015
|
4.00
|
More primer on L wing
|
|
   |
|
09-11-2015
|
3.00
|
Make and install idler bracket assembly
|
|
   |
|
09-09-2015
|
2.50
|
Installed seat belt attachments
|
|
   |
|
09-08-2015
|
3.00
|
Bolted and riveted ribs to main bulkhead
|
|

  |
|
09-03-2015
|
2.00
|
riviting rib parts and fluting edge ribs to match
|
|
   |
|
09-02-2015
|
5.00
|
Primer and sanding
|
Details
|
   |
|
09-01-2015
|
2.50
|
Sand primer and clean - prepping for the color coa
|
|
   |
|
08-31-2015
|
3.50
|
Undercoat L wing
|
|

  |
|
08-26-2015
|
5.00
|
more prepping for paint
|
|

  |
|
08-25-2015
|
2.00
|
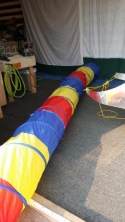
Paint prep and add an exhaust fan to the paint boo
|
|
  |
|
08-24-2015
|
4.00
|
Set up and sand wing for paint.
|
|
   |
|
08-24-2015
|
4.00
|
Finish old parts and continue working on baggage r
|
|
   |
|
08-21-2015
|
5.00
|
Preparing ribs for baggage area
|
|

  |
|
08-20-2015
|
1.50
|
Rivet on rib stiffiners
|
|
   |
|
08-20-2015
|
3.00
|
Continue working on the bulkheads
|
|
   |
|
08-19-2015
|
6.50
|
Working on the third bulkhead
|
|
   |
|
08-18-2015
|
6.00
|
Working on the wing attach bulkhead assembly
|
|

  |
|
08-17-2015
|
5.00
|
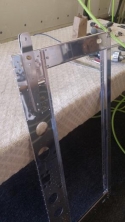
Start on Mid Fuselage bulkhead
|
|
  |
|
08-14-2015
|
4.00
|
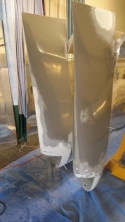
Finished R. wing tip
|
|
  |
|
08-13-2015
|
4.50
|
Continue working on R. wing tip
|
|
   |
|
08-12-2015
|
4.50
|
Continue working on bonding and sanding R. wingtip
|
|
   |
|
08-10-2015
|
1.00
|
Installing lens in R wingtip
|
|

  |
|
08-03-2015
|
3.00
|
Complete R wing riveting. Work on R. wing tip.
|
|
   |
|
07-31-2015
|
4.00
|
Finish riviting on bottom skin and work on wing ti
|
|
   |
|
07-30-2015
|
3.00
|
Riveting R. wing bottom skin
|
|
   |
|
07-29-2015
|
5.50
|
Install plexiglass on Left wingtip. Start R. wingt
|
|


 |
|
07-28-2015
|
7.00
|
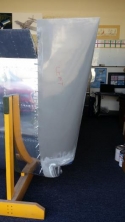
L. wing tip. Landing and position light and attach
|
|
  |
|
07-27-2015
|
4.00
|
Inventory fuselage kit
|
|
   |
|
07-27-2015
|
3.00
|
Continue riveting bottom skin
|
|
   |
|
07-16-2015
|
5.00
|
Started riveting R. wing outside bottom skin
|
|

  |
|
07-15-2015
|
3.00
|
Begin installing the Right wing botto
|
|

  |
|
07-14-2015
|
2.50
|
Install Aileeron and flap gap fairing
|
|
   |
|
06-25-2015
|
3.00
|
Filling and sanding the L wing tip
|
|

  |
|
06-24-2015
|
3.00
|
Continue fiberglassing plus work on R wing wiring
|
|
   |
|
06-23-2015
|
1.00
|
Fiberglassing in new (larger) light cutout
|
|

  |
|
06-17-2015
|
3.00
|
Fitting L wing tip and fitting landing light conve
|
|
   |
|
06-16-2015
|
7.00
|
Finished and installed all aileron push rods
|
|


 |
|
06-15-2015
|
2.00
|
Continue makingaileron push pull rods
|
|
   |
|
06-12-2015
|
3.00
|
Continued making aileron pushrods
|
|
   |
|
06-11-2015
|
1.50
|
Started making the aileron push rods.
|
|
   |
|
06-11-2015
|
5.00
|
Finally got the aileron clamped and riveted
|
|

  |
|
06-10-2015
|
6.00
|
Riveting R aileron
|
|
   |
|
06-09-2015
|
7.00
|
Working on Right aileron
|
|
   |
|
06-05-2015
|
5.00
|
Completed the Left Aileron
|
|

  |
|
06-04-2015
|
7.00
|
Half way through the left aileron
|
|
   |
|
06-03-2015
|
5.00
|
Assemble both ailerons
|
|

  |
|
06-02-2015
|
2.00
|
Started on the ailerons
|
|
   |
|
06-02-2015
|
6.00
|
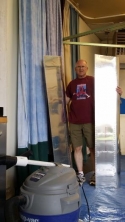
Completed both flaps
|
|
  |
|
06-01-2015
|
6.00
|
R. wing flap - assembled, drilled, disassembled,de
|
|
   |
|
05-29-2015
|
2.00
|
Finish riveting the Left Flap
|
|

  |
|
05-28-2015
|
4.00
|
Continue riveting the L wing flap
|
|

  |
|
05-27-2015
|
6.00
|
Started riveting the flap together
|
|
   |
|
05-26-2015
|
2.50
|
countersinking and dimpling L wing flap
|
|

  |
|
05-26-2015
|
3.00
|
Buff the Horz stab
|
|

  |
|
05-21-2015
|
4.50
|
Prep and paint for redo of horiz stab.
|
|
   |
|
05-18-2015
|
7.00
|
Painted the Horz Stab and elevators
|
|

  |
|
05-15-2015
|
7.00
|
Working on assemblying part for the flaps
|
|

  |
|
05-14-2015
|
3.00
|
Wash, etch, and undercoathorz stab and elevators
|
|


 |
|
05-14-2015
|
2.00
|
Preping parts for flaps
|
|
   |
|
05-13-2015
|
6.00
|
Prep to paint horz. stab and elevators
|
|

  |
|
05-12-2015
|
1.50
|
Preping parts
|
|
   |
|
05-11-2015
|
4.00
|
Install R. wing tank on the right wing spar.
|
|


 |
|
05-08-2015
|
6.00
|
worked on wireing harness for Garmin roll servo
|
|
   |
|
05-07-2015
|
6.00
|
Installed autopilot roll servo in right wing.
|
Details
|

  |
|
05-06-2015
|
5.00
|
Riveted the back and Z brackets on the R fuel tank
|
|
   |
|
05-05-2015
|
7.00
|
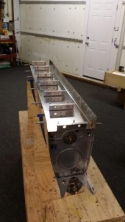
Finished installing ribs and fuel tank level float
|
|
  |
|
05-04-2015
|
3.50
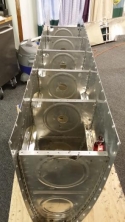
|
Finished riveting in all the ribs except the inboa
|
|
  |
|
05-01-2015
|
3.00
|
Rivet ribs in R fuel tank
|
|
   |
|
04-30-2015
|
6.50
|
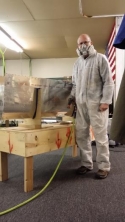
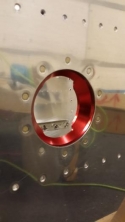
R. fuel tank - rivet flanges, fuel cap, and fuel d
|
|

|
|
04-23-2015
|
3.00
|
dimpling fuel tank skin and preparing parts.
|
|
   |
|
04-22-2015
|
7.00
|
Preping parts for the R. fuel tank
|
|
   |
|
04-21-2015
|
1.50
|
Rivet the R. outboard leading edge to the main spa
|
|

  |
|
04-21-2015
|
1.50
|
Prep R wing leading edge for riveting to wing.
|
|
   |
|
04-21-2015
|
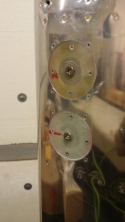
2.00
|
Complete installing deice connectors on outboard l
|
|
 |
|
04-20-2015
|
7.00
|
Installed two of three deice connectors
|
|
   |
|
04-17-2015
|
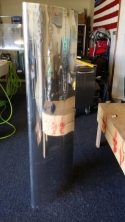
6.00
|
Riveted R. wing outboard leading eadge
|
|
  |
|
04-16-2015
|
6.00
|
Preping R outboard leading edge for riveting
|
|
   |
|
04-15-2015
|
5.50
|
Made the R wing landing light cover
|
|

  |
|
04-14-2015
|
7.50
|
Rivet top skin to R. Wing. cleko outboard forward.
|
|


 |
|
04-13-2015
|
8.00
|
R. wing top skin preped and ready to rivet
|
|

  |
|
04-10-2015
|
2.50
|
Finished riveting the rear spar to the R. wing
|
|

  |
|
04-09-2015
|
4.50
|
Prepare and cleko rear spar to R. wing
|
|

  |
|
04-07-2015
|
5.00
|
Finished rib install. Made parts for rear spar.
|
|
   |
|
04-06-2015
|
2.00
|
bolt and rivet ribs to main spar
|
|

  |
|
04-03-2015
|
2.50
|
Install ribs in left wing
|
|

  |
|
04-02-2015
|
3.00
|
Preping ribs for install to main spar
|
|
   |
|
04-01-2015
|
1.50
|
Make improved mounts for main spar on rotissary.
|
|
   |
|
04-01-2015
|
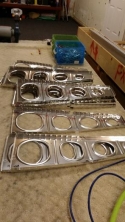
7.00
|
Finish readying spar and start readying ribs
|
|
  |
|
03-31-2015
|
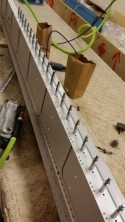
4.50
|
Install nutplates and counersink R. wing main spar
|
|

 |
|
03-27-2015
|
3.00
|
R wing spar J strips and countersinking
|
|
   |
|
03-26-2015
|
2.50
|
Finish L wing. Start on R. wing spar
|
|
   |
|
03-25-2015
|
2.00
|
Finished l wing
|
|

  |
|
03-24-2015
|
6.50
|
Continue riviting on the bottom skin - left wing
|
|

  |
|
03-23-2015
|
8.00
|
Pitot static and begin riveting lower skin
|
Details
|

  |
|
03-20-2015
|
1.00
|
Pitot, AOA, a d Static
|
Details
|
   |
|
03-13-2015
|
3.00
|
Dimple outer lower wing skin and readfy for riveti
|
|
   |
|
03-12-2015
|
6.50
|
Constructed and installed AHRS mount
|
|


 |
|
03-11-2015
|
3.50
|
Designing AHRS bracket for G3X
|
|
   |
|
03-10-2015
|
4.00
|
Start dimpling bottom skins and design AHRS base.
|
Details
|
   |
|
03-09-2015
|
8.50
|
Reposition L outboard deice terminal
|
|
   |
|
03-06-2015
|
8.00
|
Started preparing the bottom skin for install
|
|

  |
|
03-05-2015
|
2.00
|
Installed wire runs in the left wing
|
|


 |
|
03-04-2015
|
2.50
|
Installed R outside horz stab deice terminal and e
|
|
   |
|
03-02-2015
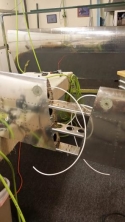
|
4.00
|
Installed the two inner deice terminals on the Hor
|
|
  |
|
02-27-2015
|
2.00
|
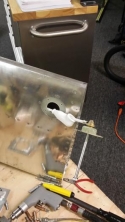
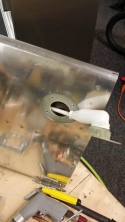
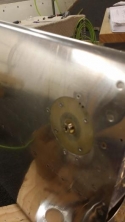
Finish installing one Horz deice power terminal
|
|
|
|
02-23-2015
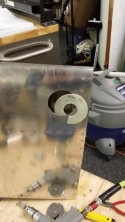
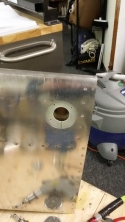
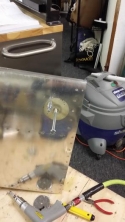
|
2.00
|
Begin install R outboard Horz stab deice terminal
|
|
|
|
02-20-2015
|
4.00
|
Attach fuel tank to left wing
|
|
   |
|
02-19-2015
|
7.00
|
Wing leading edge
|
Details
|

  |
|
02-18-2015
|
4.00
|
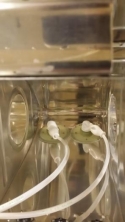
Wired up deice terminals in the L wing Outboard
|
|
 |
|
02-18-2015
|
4.00
|
Riveting the L wing outboard leading edge
|
|

  |
|
02-17-2015
|
4.00
|
Inspection plates and wiring
|
Details
|

  |
|
02-16-2015
|
4.00
|
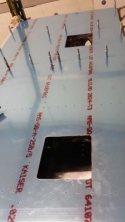
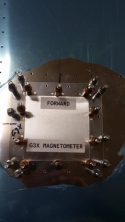
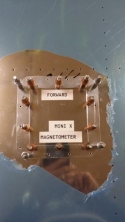
Make inspection holes and plates for the Magnetome
|
|
|
|
02-13-2015
|
4.00
|
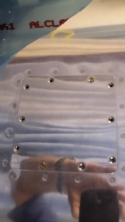
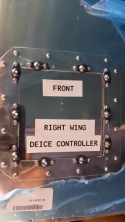
Made R wing deice controller inspection port
|
|
 |
|
02-12-2015
|
2.00
|
Finished install of Mini X magnetometer bracket
|
|
   |
|
02-12-2015
|
2.00
|
Began making access ports for magnetometers.
|
|
   |
|
02-11-2015
|
4.00
|
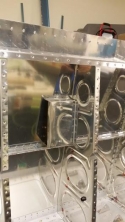
Begin install of backup magnetometer bracket
|
|
  |
|
02-10-2015
|
5.50
|
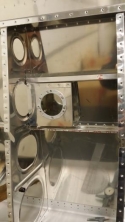
Install magnetometer bracket
|
|
  |
|
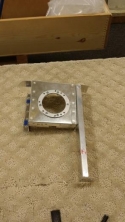
02-09-2015
|
8.50
|
Build bracket for magnetometer
|
|
  |
|
02-07-2015
|
4.00
|
Designing and constructing a Magnetometer bracket
|
|
   |
|
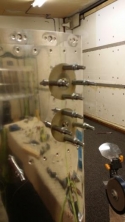
02-06-2015
|
6.00
|
Installed 3 of 4 L wing power connectors
|
|


|
|
02-06-2015
|
1.00
|
Final work on Left wing tank. Next - install on wi
|
|
   |
|
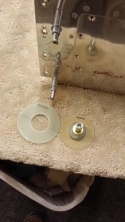
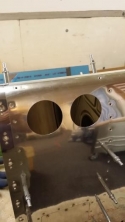
02-05-2015
|
2.00
|
Started installing wing connector studs
|
Details
|
 |
|
02-05-2015
|
1.00
|
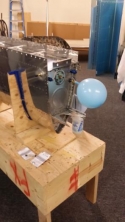
Pressure test the left wing tank. Tested OK.
|
|
  |
|
02-05-2015
|
1.00
|
Figuring the angles for the magnetometer bracket
|
|
   |
|
02-03-2015
|
2.00
|
Repaired Leak in Left wing fuel tank
|
|
   |
|
02-03-2015
|
2.00
|
Layout terminal position and shape first termina
|
|
   |
|
02-03-2015
|
2.00
|
design bracket for megnetometer
|
|
   |
|
02-02-2015
|
2.00
|
Testing fuel tank for leaks and found one.
|
|
   |
|
02-02-2015
|
2.00
|
Started experimenting on scrap with cutting holes
|
|
   |
|
01-30-2015
|
8.00
|
Finish sealing the L tank
|
|

  |
|
01-29-2015
|
6.00
|
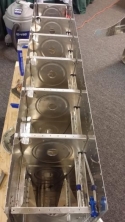
Continue riveting and sealing the L fuel tank
|
|
  |
|
01-28-2015
|
3.00
|
Continue riveting L wing tank
|
|
   |
|
01-27-2015
|
8.00
|
Sealing L wing tank
|
|
   |
|
01-23-2015
|
8.00
|
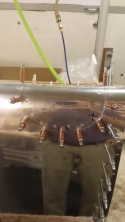
Filled hole for left landing light
|
Details
|
  |
|
01-22-2015
|
6.50
|
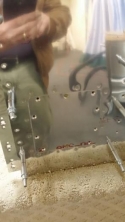
Installed access plate and built a work table
|
Details
|

 |
|
01-12-2015
|
3.50
|
Dimpling the tank skin.
|
|
   |
|
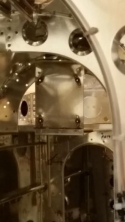
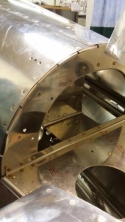
01-09-2015
|
7.00
|
Installrd the Horizontal stab deice controller bra
|
Details
|
 |
|
01-08-2015
|
6.00
|
Continue preparing parts for the L wing
|
|
   |
|
01-07-2015
|
6.00
|
prep of Zee subassembly, j channels L wing tank
|
|

  |
|
01-06-2015
|
3.50
|
Continue prepping parts ofr the L fuel tank
|
|

  |
|
01-05-2015
|
3.00
|
prepare ribs for R wing fuel tank
|
|
   |
|
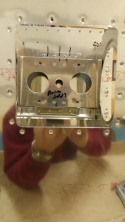
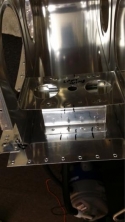
01-05-2015
|
6.00
|
Make Wing controller brackets
|
Details
|

|
|
01-02-2015
|
8.00
|
Prepraring the L forward wing skins
|
|
   |
|
12-31-2014
|
2.00
|
Continue preping L Outboard forward ribs
|
|
   |
|
12-30-2014
|
3.00
|
Preping L forward ourboard wing ribs
|
|
   |
|
12-29-2014
|
8.50
|
Finish riveting Top L wing skin
|
|

  |
|
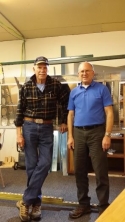
12-26-2014
|
5.00
|
Rivety most of top skin on L wing
|
|

 |
|
12-24-2014
|
5.00
|
Started preparing outboard leading edge of L wing
|
|
   |
|
12-19-2014
|
3.00
|
Finished dimpling and preping. Cleko'd skins on.
|
Details
|


 |
|
12-18-2014
|
2.00
|
continue prep and dimple
|
|
   |
|
12-17-2014
|
4.00
|
prep and dimple upper skins
|
|
   |
|
12-16-2014
|
7.00
|
Prepare L wing top skin for installation
|
|

  |
|
12-15-2014
|
5.00
|
L wing rear spar
|
|
   |
|
12-15-2014
|
2.50
|
Install left wing rear spar
|
|

  |
|
12-12-2014
|
6.00
|
Preping the left wing rear spar
|
|
   |
|
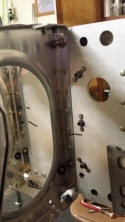
12-11-2014
|
4.00
|
Bolted and rivited aft ribs to L main spar
|
|
  |
|
12-10-2014
|
7.00
|
install grommets and start rib install
|
|
   |
|
12-09-2014
|
5.50
|
Finish rib prep and install on mai
|
|

  |
|
12-08-2014
|
4.50
|
Preping ribs
|
|
   |
|
12-08-2014
|
4.50
|
Made rotisery for left wing
|
|

  |
|
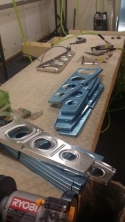
12-05-2014
|
5.00
|
Prepare wing ribs (deburr, flute, dimple)
|
|
  |
|
12-04-2014
|
4.50
|
Finished L main spar and started wing ribs.
|
Details
|
   |
|
11-20-2014
|
1.00
|
Replaced elevbator trim connector link.
|
Details
|

  |
|
11-19-2014
|
1.00
|
Finished installing nutplates on L main spar
|
|


 |
|
11-17-2014
|
1.50
|
Coutersinking and start riviting nut plates
|
|
   |
|
11-05-2014
|
4.00
|
Countersinking rivet and screw holes in the left s
|
|

  |
|
11-04-2014
|
3.50
|
Finish match drill J strips on left wing. Drill #4
|
|
   |
|
10-31-2014
|
1.50
|
Start match drill J strips
|
|
   |
|
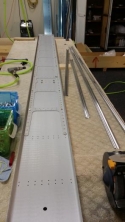
10-30-2014
|
5.00
|
Inventory and store wing parts and start
|
|
  |
|
10-29-2014
|
2.00
|
Final fiberglass ofvertical stab cap. Start updack
|
|
   |
|
10-28-2014
|
6.50
|
Elevator adjustment and gap faring
|
Details
|
   |
|
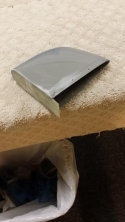
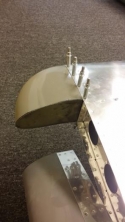
10-27-2014
|
2.50
|
Third step fiberglassing end caps
|
|
 |
|
10-26-2014
|
3.00
|
Second step of fiberglassing
|
|
   |
|
10-25-2014
|
1.00
|
Initial firberglassing of end caps
|
|
   |
|
10-24-2014
|
3.50
|
Preparing end caps for fiberglassing
|
|
   |
|
10-23-2014
|
2.00
|
1.5 hrs trying to put in Vans update rivet. Starte
|
|
   |
|
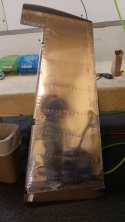
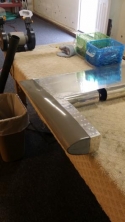
10-22-2014
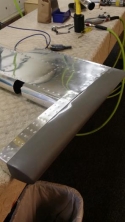
|
7.00
|
Rudder top cap and elivators end caps
|
|
|
|
10-21-2014
|
3.00
|
Rudder bottom cap. Van's Oct 14 plans update.
|
|
   |
|
10-20-2014
|
5.00
|
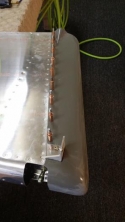
Prepare rudder faring
|
|
  |
|
10-17-2014
|
5.50
|
Final rudder and elevator adjustments
|
|
   |
|
10-16-2014
|
5.00
|
Install vertical stab and start install of ruddder
|
|

  |
|
10-15-2014
|
5.00
|
set up elevators and mount Horz Stab on the tailco
|
|

  |
|
10-14-2014
|
6.50
|
Fitting of elevators to horizontal stabalizer
|
|
   |
|
10-08-2014
|
2.00
|
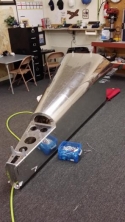
Finished riveting the top skin on the aft fuselage
|
|
  |
|
10-07-2014
|
4.00
|
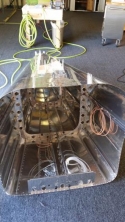
Finish riveting the side skins.Riveting on the top
|
|

 |
|
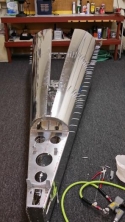
10-03-2014
|
5.00
|
Completed riviting L rear topside and started R re
|
|
  |
|
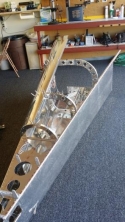
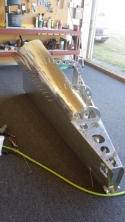
10-02-2014
|
5.50
|
Started riviting on the left rear top skin
|
|
 |
|
10-01-2014
|
8.00
|
Finished back deck and started top skin
|
|
   |
|
09-30-2014
|
5.00
|
Installed ant cables. Began installing rear deck.
|
|

  |
|
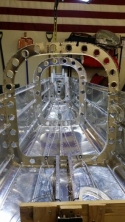
09-25-2014
|
3.50
|
Installed rudder cable guides and replaced some ri
|
Details
|
  |
|
09-24-2014
|
7.00
|
Continue riveting aft fuselage plus nutplates
|
|
   |
|
09-23-2014
|
5.50
|
Continued riveting the aft fuselage
|
|
   |
|
09-22-2014
|
5.50
|
Continue riveting theaft hull
|
|
   |
|
09-19-2014
|
3.00
|
Riveting onaft fuselage
|
|
   |
|
09-18-2014
|
3.00
|
Prepping for another riveting session.
|
Details
|
   |
|
09-17-2014
|
8.00
|
Rebuit the connectors on the Rotator.
|
Details
|


|
|
09-16-2014
|
2.00
|
Riveted 2/3 of the right side
|
Details
|


 |
|
09-16-2014
|
8.00
|
Made a "rotator" to hold the aft fuselage
|
|
   |
|
09-15-2014
|
3.00
|
Riveted F01411 and F01410 to bottom skin
|
|
   |
|
09-10-2014
|
4.50
|
Aft most bulkhead riveted to lower tail piece
|
|
   |
|
09-09-2014
|
2.00
|
strung in two wiring harnesses
|
|

  |
|
09-08-2014
|
8.00
|
continue building the tail empennage
|
|

  |
|
09-05-2014
|
6.00
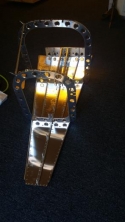
|
Begin riveting the tailcone together
|
|

 |
|
09-04-2014
|
8.50
|
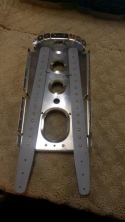
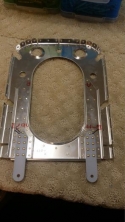
contructed two tailcone ribs
|
Details
|
 |
|
08-29-2014
|
0.00
|
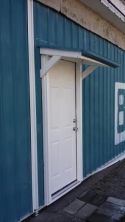
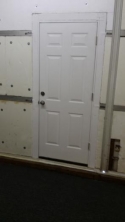
Install a man door in one sliding hangar door
|
Details
|
 |
|
08-13-2014
|
2.50
|
Construct Vert stabalizer connecting rib
|
|

  |
|
07-25-2014
|
4.00
|
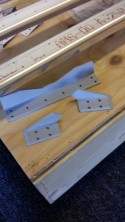
Made rudder stop parts
|
Details
|
  |
|
07-22-2014
|
6.00
|
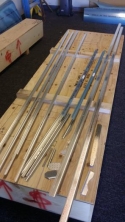
Prepare parts for tail cone
|
|
  |
|
07-18-2014
|
4.00
|
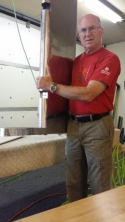
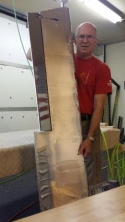
Elevator trim wiring and close front of elevators
|
|
 |
|
07-17-2014
|
2.00
|
Cutting the elevator counter weights to size
|
|
   |
|
07-15-2014
|
8.00
|
Continue final riveting of elevators
|
|
   |
|
07-14-2014
|
7.00
|
Applied tank sealer for ribs and closed
|
Details
|

  |
|
07-11-2014
|
6.50
|
Continued riveting the left elevator
|
|
   |
|
07-10-2014
|
6.50
|
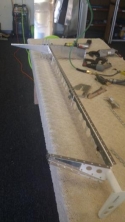
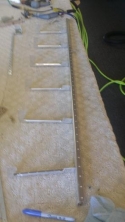
Dimple and begin riviting or Left elevator
|
|

|
|
07-09-2014
|
1.00
|
Started dimpling the Left elivator
|
|
   |
|
06-27-2014
|
2.00
|
Working on parts for trim tab
|
|


 |
|
06-23-2014
|
5.50
|
Riveted bottom of the trim tab
|
Details
|

  |
|
06-19-2014
|
4.00
|
Work on trim tab
|
|
   |
|
06-13-2014
|
2.00
|
Continue riveting Right elevator
|
|
   |
|
06-12-2014
|
8.00
|
Begin riveting right elevator
|
|
   |
|
06-11-2014
|
4.50
|
Deburring and dimpling right erlevator
|
|
   |
|
06-09-2014
|
4.00
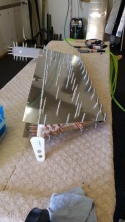
|
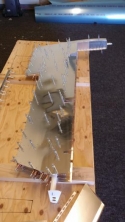
elivator assembled with cleko's
|
|
 |
|
06-05-2014
|
5.00
|
Elivavator trim hinge
|
Details
|
   |
|
06-03-2014
|
7.00
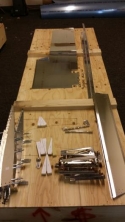
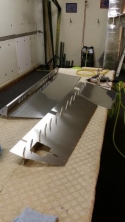
|
Progress on the elevator
|
Details
|
 |
|
06-02-2014
|
5.50
|
Start elevator
|
|
   |
|
05-30-2014
|
2.00
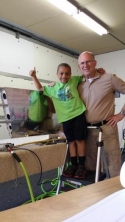
|
Finished riveting the horizontal stabalizer
|
|
  |
|
05-29-2014
|
3.50
|
Started riveting the aft spar
|
|

  |
|
05-28-2014
|
5.50
|
Continue riveting the horizontal empennage togethe
|
|
   |
|
05-27-2014
|
6.00
|
Continued riveting horizontal stabilizer
|
|
   |
|
05-23-2014
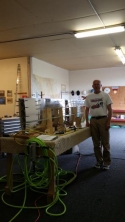
|
9.00
|
Nose ribs riveted to skin and to rib assembly
|
Details
|
  |
|
05-21-2014
|
4.00
|
Horizontal stabilizer structure
|
|

  |
|
05-20-2014
|
3.00
|
Finished dimpling the skins. Started riveting ribs
|
|
   |
|
05-19-2014
|
7.00
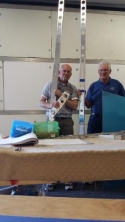
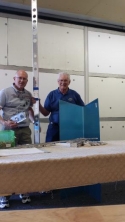
|
Horizontal Stabalizer
|
Details
|
 |
|
05-17-2014
|
2.50
|
Finish riviting the gussets to the forward spar
|
|
   |
|
05-16-2014
|
3.00
|
Working on the stiffiners for the front spar
|
|
   |
|
05-14-2014
|
3.50
|
Start on Horz Stab forward spar
|
|
   |
|
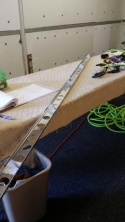
05-13-2014
|
5.00
|
Start Horz Stab
|
|
  |
|
05-08-2014
|
3.50
|
Finish Rudder and Start Horizontal Stab
|
|
   |
|
05-06-2014
|
6.00
|
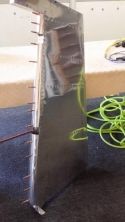
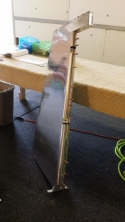
Rudder almost done
|
Details
|
 |
|
05-05-2014
|
6.00
|
Begin Riveting Rudder together
|
|


 |
|
05-02-2014
|
5.50
|
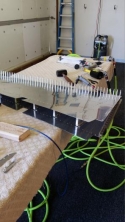
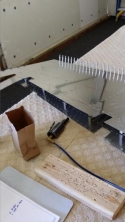
Start the reassemble of the rudder with rivets
|
|
 |
|
05-01-2014
|
4.50
|
Disassembled rudder, deburred, Dimpled 400 holes
|
|

  |
|
04-30-2014
|
6.00
|
Drill out every hole, disassemble, debure
|
|
   |
|
04-29-2014
|
4.50
|
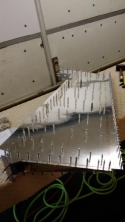
Rudder initial cleco assembly
|
|
  |
|
04-24-2014
|
6.00
|
Started rudder
|
|

  |
|
04-23-2014
|
3.00
|
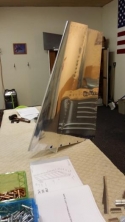
Final Riveting of VS
|
Details
|

 |
|
04-22-2014
|
5.00
|
Dimpling and Start Riveting VS
|
|

  |
|
04-17-2014
|
5.00
|
Start Riviting Process
|
Details
|


 |
|
04-16-2014
|
2.00
|
Disasemble and debur
|
|
   |
|
04-05-2014
|
4.00
|
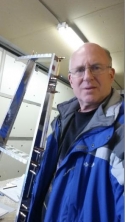
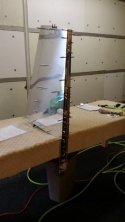
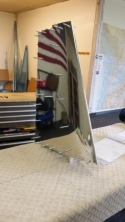
Figured out fluting and did initial covering of VS
|
Details
|
|
|
04-04-2014
|
2.00
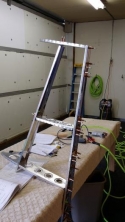
|
Start working on step 2
|
|
  |
|
03-30-2014
|
1.50
|
pg 06-02 doubler install
|
|


 |
|
03-25-2014
|
0.00
|
Install grinder, wall hooks, electric sockets
|
Details
|


|
|
03-24-2014
|
0.00
|
Carpet shelves, carplet worktable, clean up
|
Details
|
   |
|
03-23-2014
|
0.00
|
Cover workbench, make work table, repair shelf
|
Details
|
   |
|
03-22-2014
|
3.00
|
Inventory kit
|
Details
|


 |
|
03-13-2014
|
2.00
|
empennage and wing kits delivered
|
Details
|

  |

